Introduction:
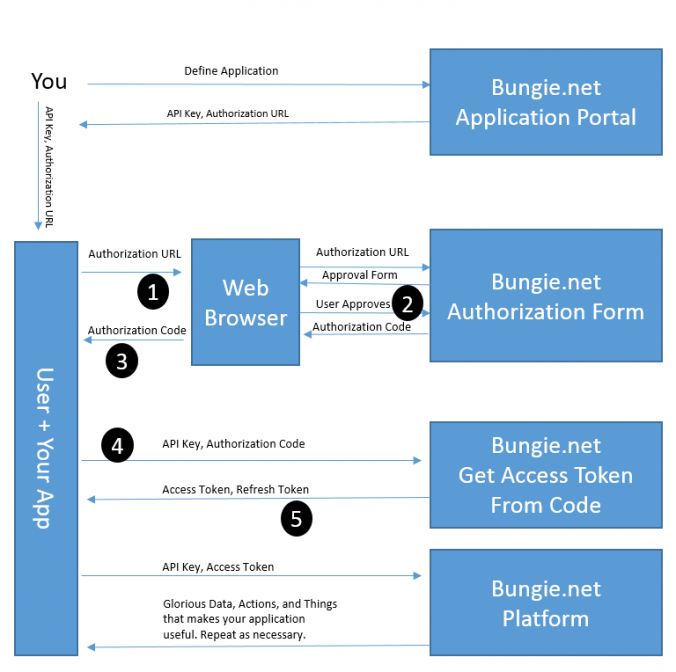
Bungie are moving away from their Cookie based authentication flow and have created a new OAuth 2.0 style flow, this allows for a safer, more standardised approach to authenticating users with Bungie.net. Read the Bungie.net authentication release article here.
Bungie outline some of the benefits of using the new authentication flow:
- It uses OAuth 2.0 style sign in flow, and does not depend on fragile cookies.
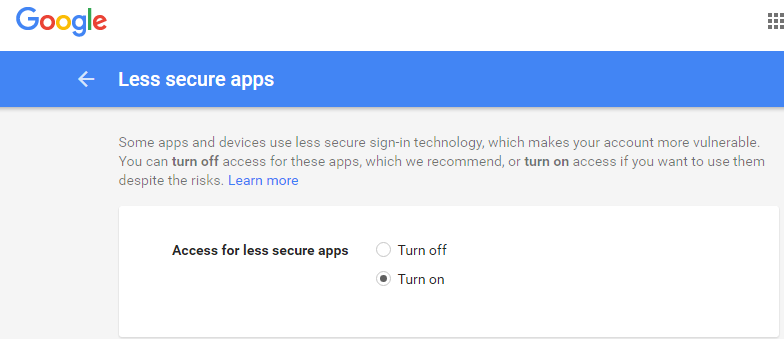
- It gives the user a chance to review the scope of permissions granted to an application so they can understand what the application can do on their behalf.
- Users can review all write operations performed by an application, and disable apps they no longer wish to have access.
- It’s sanctioned by Bungie, and we will smile upon apps that use this mechanism instead of cookies. Also, this is the only mechanism permitted by our terms of service for application developers to make use of APIs that require authentication.
If you’d like to review the previous Destiny API posts, check them out here:
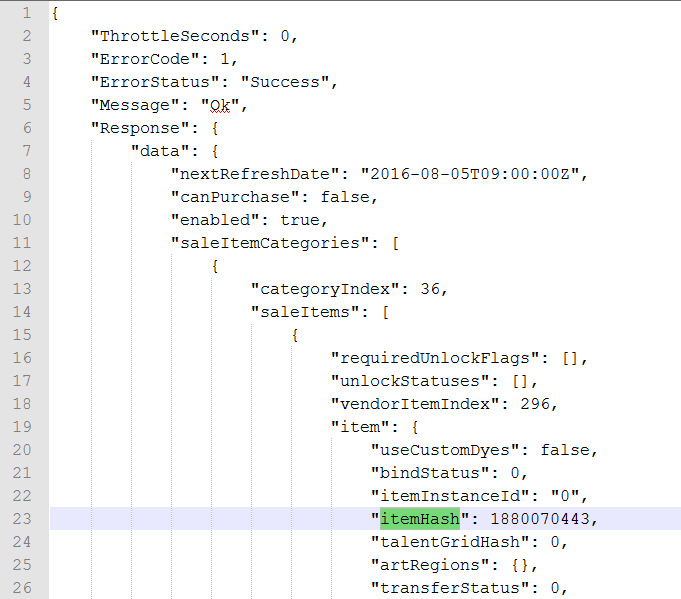
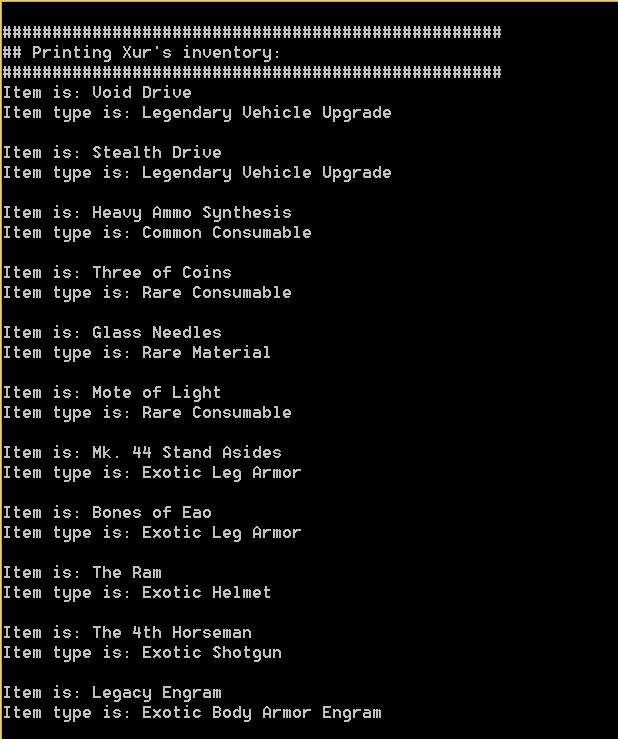
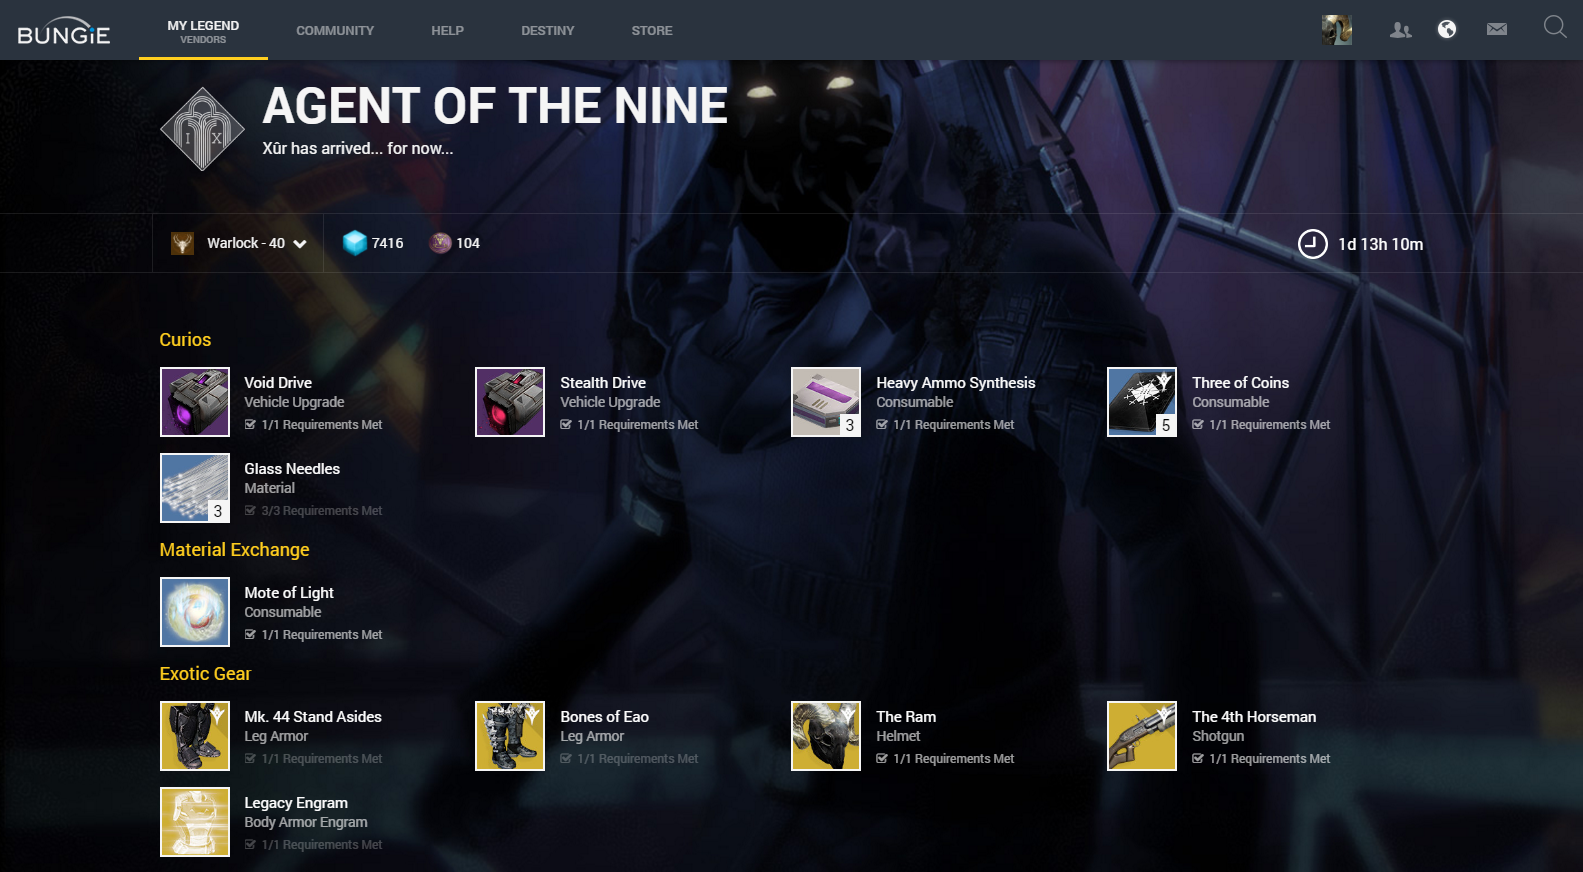
- Send a request to read Xurs inventory.
- Send a HTML formatted email with Xurs inventory.
- Log into Destiny and Bungie.net via your PSN account.
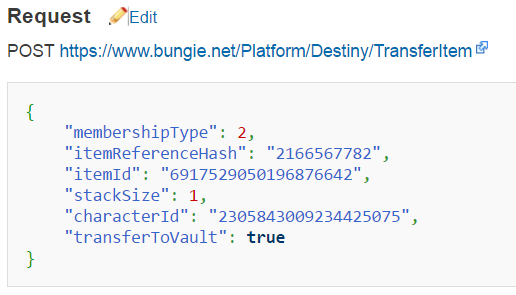
- Transfer items from your vault to your character and equip them.
- Reading a characters inventory and vault contents.
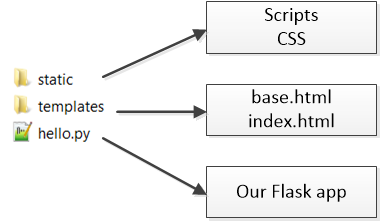
- Creating a Python web server with Flask.
You can also find me on Twitter here @Allyn_H_
Also, many thanks to all the people involved in the Destiny Item Manager development team (too many to name individually) and Vlad from Destiny Trials Report, for their help debugging some of the issues with the OAuth flow!
Creating an app on Bungie.net:
To create an app on Bungie, you need to visit the developer page here. If you’ve previously created one, you’ll need to update it for the new authentication flow.
Fill in the required details:
- Application name: Give your app a recognisable name.
- Application status: Set it to private unless you plan to deploy this app.
- Website: A place where people can find details of your app.
- Redirect URL: You’ll need to set a HTTPS redirect URL for your app in order to complete OAuth authorisation.
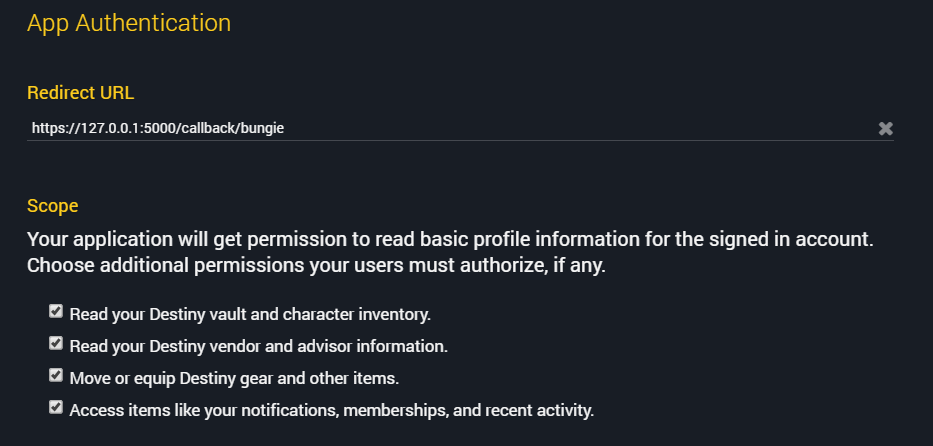
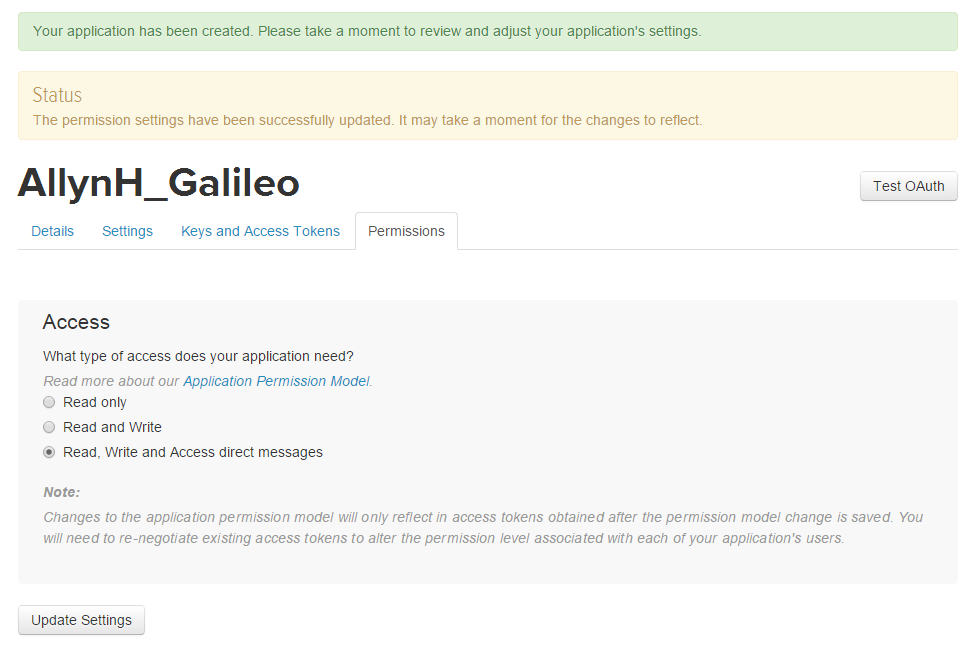
I’ve added all the permissions here, as I’m also using this to test other features – you may not need all these permissions.
Then click on the save changes button at the bottom.
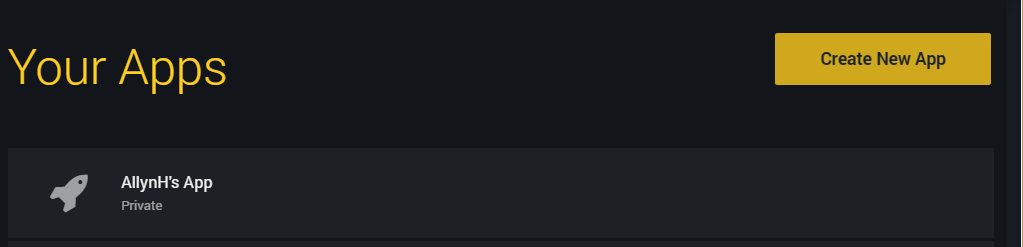
App is created, now let’s get coding!
Now, let’s get to coding up the flow…
Creating the authorisation URL:
When you registered your app on Bungie, you should have been given an authorisation URL with a unique number, like this: https://www.bungie.net/en/Application/Authorize/1234.
We are going to take that URL and add some parameters to it before we make our authorisation request. Here’s what the updated “index.html” route looks like:
AUTH_URL = 'https://www.bungie.net/en/Application/Authorize/1234?'

@app.route('/')
@app.route('/index')
def index():
    state = make_authorization_url()
    state_params = {'state': state}
    url = AUTH_URL + urllib.urlencode(state_params)
    return render_template('index.html', url=url)
Before we look at what the state parameter is doing, here’s how we pass the URL to our HTML “index.html” template, via the render_template method.
Creating the index page:
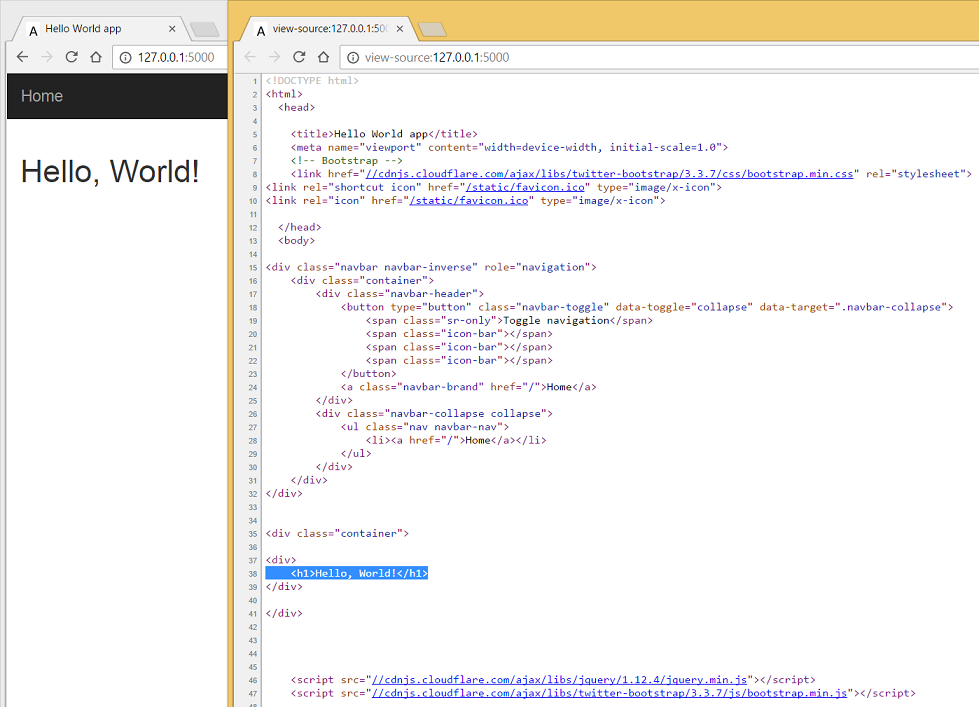
I’m going to build on the templates made in the previous blog post, you can review them here. The index.html page is left deliberately bare, there’s a lot of cool stuff we could do here but let’s get our basic program up and running first. In our index.html template file, we can create a hyperlink to authorise our account like this:
{% block page_content %}

<div>
    <h2><a href="{{ url }} " >Authenticate with Bungie</a></h2></br></br>
</div>


{% endblock %}
The value for {{ url }} will be passed in from the render_template method, and the hyper link will be created.
Preventing Cross Site Request Forgery with the state parameter:
As an extra precaution, we are going to add some Cross Site Request Forgery (CSRF) protection, as an added security benefit to the visitors of our site, there is a great post about this, referenced on the Bungie authentication article, you can read the post here.
Here’s how we are going to handle the state parameter of our authorisation request and callback:
- Create a state value, a random string of numbers and letters.
- Save this state value in the users secure HTTPS session.
- Add this parameter to the authorisation URL when we direct the user to the Bungie authorisation URL.
- When the user is redirected to back to our site via the callback URL, Bungie will echo the state parameter back to us.
- Compare the state parameter from Bungie and the state parameter we stored in the users session.
If the state parameters are the same – we know the user is who they say they are, and nothing dodgy is happening.
Here’s what the state parameter looks like in action:
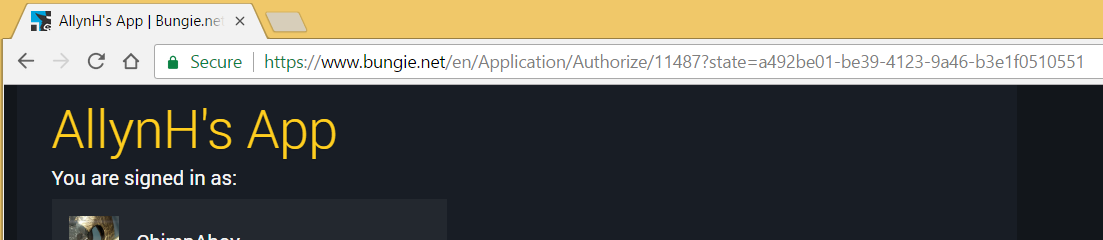
Here we can see the state parameter in the URL.
Here’s what it looks like when Bungie redirects the user to the callback URL:
User is redirected to the callback URL, then redirected to the /index route.
Let’s code this up – here’s what our index view looks like (deliberately basic):
@app.route('/')
@app.route('/index')
def index():
    state = make_authorization_url()
    state_params = {'state': state}
    url = AUTH_URL + urllib.urlencode(state_params)
    print url
    return render_template('index.html', url=url)
The first thing we do is call the function make_authorization_url() and store the result in the “state” variable.
Inside the make_authorization_url(), we create a unique UUID (Universally Unique Identifier) 32 bit string, using the Python library “uuid4”. We store this UUID string in a variable called “state”.
Now that we have generated the state string, we’ll need to store, so we then call a function, save_created_state(state) and pass it the “state” value we just generated. We also return the
Here’s what the code looks like:
def make_authorization_url():
    # Generate a random string for the state parameter
    from uuid import uuid4
    state = str(uuid4())
    save_created_state(state)
    return state
Now that we have generated the “state” value, we need to store this in the session, here’s what the code for save_created_state() looks like:
# Save state parameter used in CSRF protection:
def save_created_state(state):
    session['state_token'] = state
    pass
Now that we have generated the state parameter, we can generate our authorisation URL and send the user to Bungie to be authenticated.
Handling a callback:
Once we have sent our request for authorisation, our server will listen on the callback URL for a response. The response from Bungie will also echo our CSRF state parameter back to us, so we are sure the response is from Bungie.
The callback route should read the state parameter, test to see if it’s the same parameter we stored in the users session – if it’s not the same state parameter- we send a HTTP 403 “forbidden” response. If the state parameter is the same as the one we sent, we can then store the authorisation code (access_token).
@app.route('/callback/bungie')
def bungie_callback():
    state = session.get('state_token')
    if not is_valid_state(state):
        print "Uh-oh, this request wasn't started by us!"
        abort(403)
    session.pop('state_token', None)
    code = request.args.get('code')
    access_code = code
    token = get_token(code)
    return redirect(url_for('index'))
The method is_valid_state(state) is used to check that the state echoed back from Bungie is the same as the state value we have stored in our session.
Below you can see we are passing in the returned state value and comparing it to the “saved_state” value taken from the session:
def is_valid_state(state):
    saved_state = session['state_token']
    if state == saved_state:
        print "States match, you are who you say you are!"
    return True
    else:
        return False
If the states match, we return “True” and send our request for the access_token, if the states do not match, we return “False” and throw our 403 error.
The code “session.pop(‘state_token’, None)” removes the state parameter from the session (set’s it to “None”) – we don’t need it anymore.
Getting the Access Token from the Authorisation Code:
Now that the user has authorised their account and we have received the authorisation code from Bungie.net, we can swap this authoirsation code for the access token. This relates to step 4 & 5 of the Bungie.net authorisation flow.
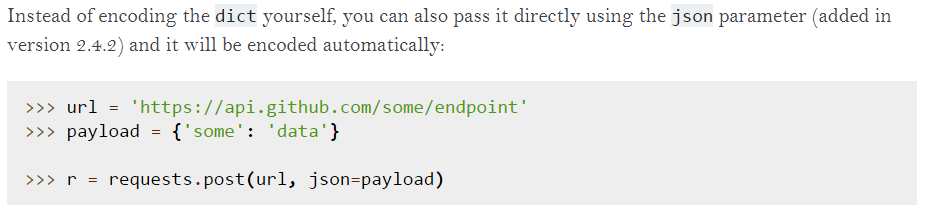
First, we take the authorisation code and add it as the value of a Python dictionary object “post_data” – this dictionary object will be added to the body of the post request and transmitted as a JSON object.
def get_token(code):
    HEADERS = {"X-API-Key":'MY-API'}
    post_data = {'code': code}
    response = requests.post(access_token_url, json=post_data, headers=HEADERS)
    :
Now that we have made a request for the token – lets look at the response:
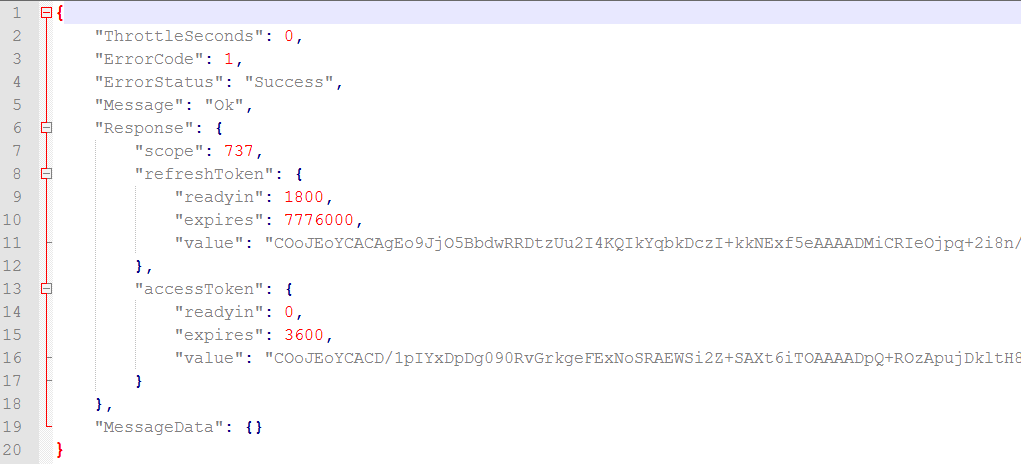
JSON response containing access_token and refresh_token.
The section we are most interested in (right now) is:
    "accessToken": {
        "readyin": 0,
        "expires": 3600,
        "value": "COoJEo ... j8w=="
 }
We now have the access token needed to make any authorised API request! The response contains a bit more information too; the access token is ready in 0 seconds – which means we can use it immediately. The access token will expire in 3600 seconds – 1 hour from now. The access token value, is of course, the really long string.
Now that we have the JSON response, we can save the access token and the refresh token. I’m also saving the time values which tell me when my refresh token is ready and when it expires.
I’m not going to worry about refreshing the token in this blog post, as it takes a bit more work. I will be updating my code and writing a new blog post at a later date.
def get_token(code):
    :
    access_token = response.json()['Response']['accessToken']['value']
    refresh_token = response.json()['Response']['refreshToken']['value']
    refresh_ready = datetime.now() + timedelta(seconds=int(response.json()['Response']['refreshToken']['readyin']))
    refresh_expired = datetime.now() + timedelta(seconds=int(response.json()['Response']['refreshToken']['expires']))
    save_session(token_json)
    userSummary = GetCurrentBungieUser(oauth_session)
    return userSummary.json()['Response']['displayName']
We will use this to create an authorised HTTP session.
Creating our authorised session:
Now that we have our API key and our access token – we can create an authorised session. As before the API-Key is added to the session header “X-API-Key”. We also need to add an “Authorization” header with the value of our access token, here’s how the access token above would look: “Bearer COoJEo … j8w==” (I’ve shortened it a little here).
Here’s the code to create the session:
def save_session(token_json):
    oauth_session = requests.Session()
    oauth_session.headers["X-API-Key"] = API_KEY
    oauth_session.headers["Authorization"] = 'Bearer ' + str(token_json)
    access_token = "Bearer " + str(token_json)
Making an authorised request:
Now that we are authorised – we can try a simple GET request to the GetCurrentBungieAccount endpoint (as recommended in the Bungie Auth article), this will give us some information on the logged in character, from their Bungie account.
For this – I’ve created a new view template called “vault.html”, for now this is just a straight copy of the “index.html” template. In the future, I’ll populate this with all of the vault contents.
def vault():
    userSummary = GetCurrentBungieAccount(oauth_session)
    return render_template('vault.html',
        character=userSummary.json()['Response']['user']['displayName'],
        lightLevel = charSummary.json()['Response']['data']['characterBase']['stats']['STAT_LIGHT']['value'],
        emblemImage = account.json()['Response']['data']['characters'][0]['emblemPath'],
        backgroundImage = account.json()['Response']['data']['characters'][0]['backgroundPath'],
    )
Here’s what the code for GetCurrentBungieAccount looks like, as we’ve seen before, it’s the same Python Requests GET format, we are passing the “oauth_session”, that we saved a moment ago, into the function as a parameter. We are returning the JSON response to the vault() route.
def GetCurrentBungieAccount(session):
    req_string = 'https://www.bungie.net/Platform/User/GetBungieNetUser/'
    res = session.get(req_string)
    return res
I’ve also created a new function to return some character specific data using the getCharacterSummary endpoint, this will give me some data like my characters light level and my characters emblem.
def GetCharacterSummary(session):
    req_string = base_url + membershipType + "/Account/" + destinyMembershipId + "/Character/" + characterId + "/"
    res = session.get(req_string)
    return res
Viewing our web site:
As usual, the full set of code can be found on my GitHub page:
https://github.com/AllynH/Destiny_Flask_Webserver
There are a few files / folders, so you’ll need to download it from there.
To run the code you can type:
python app.py
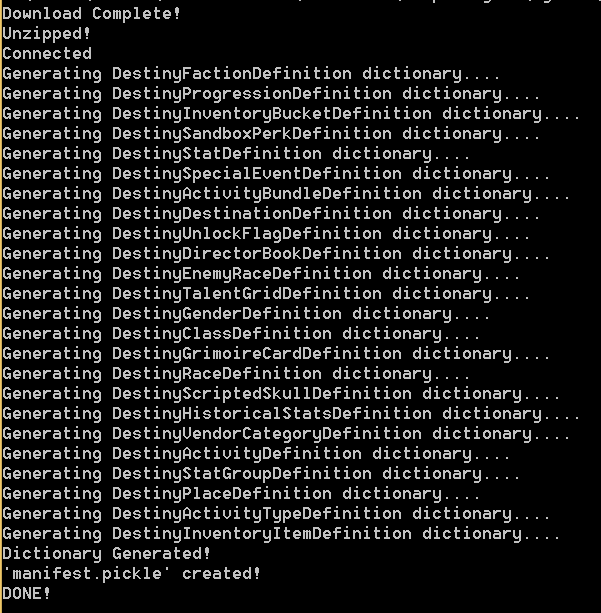
This will start the Flask Web Server, you’ll see some output like this:
* Restarting with stat
Opening Manifest...
Finished!
 * Debugger is active!
* Running on https://127.0.0.1:5000/ (Press CTRL+C to quit)
First, click on the “Authenticate with Bungie” link and follow the instructions to authenticate your account.

Here is the view of the index page.
You should see a screen like this, asking you to review and approve the permissions required by this app.
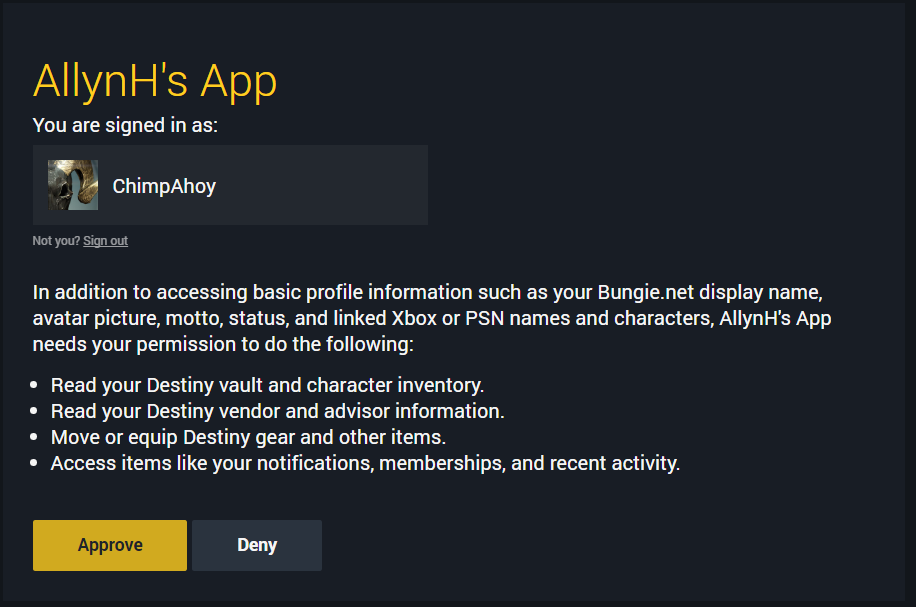
Don’t forget to review what permissions your giving the app.
You should then be redirected back to the index page.
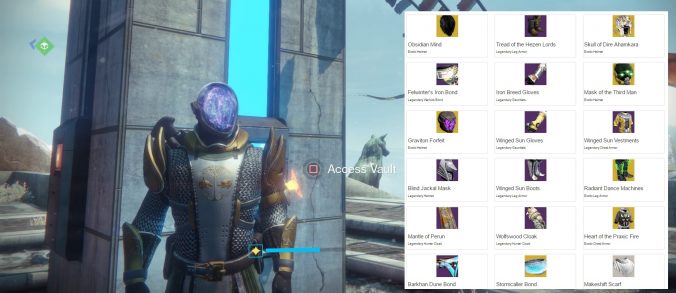
Now that you’ve been authorised and logged into Bungie via our app, we can open the link “view your vault contents”, you’ll see something like this:
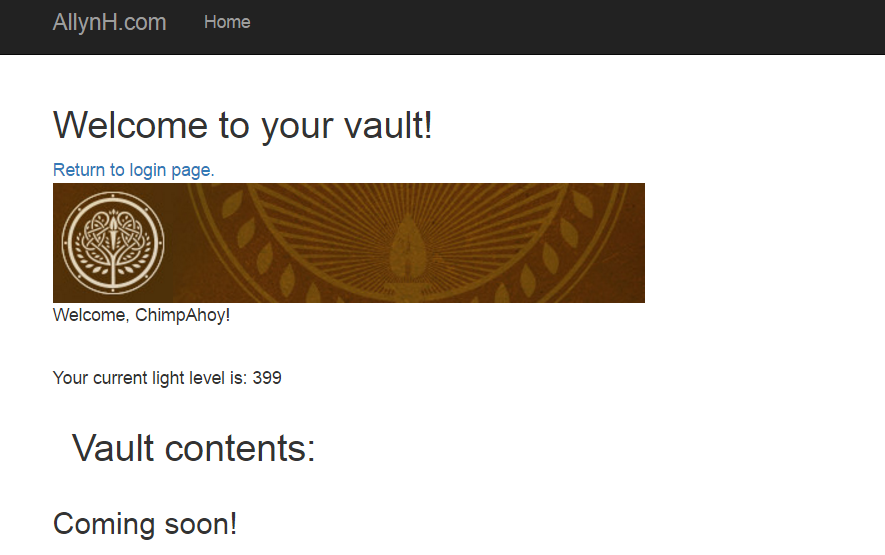
Gamertag, light level, Emblem and emblem background display.
Next steps:
Right now, we’ve created the basic shell of the website / app. This is a good start and we can build onto this, add features, create new pages.
The next steps for me will be to add more functionality to the website:
- Character inventory view.
- Xur inventory view.
- Finish the refresh token flow, so users don’t need to authenticate every 30 mins.
- Add a user database to securely store the users refresh tokens.
- Add a transfer item feature.
All of the above is finished (except the transfer item feature), I just need to write up the blog post 🙂 I’m looking to deploy the code soon to a real live web site, so stay tuned.