Making things, writing code, wasting time...

Category: Debian

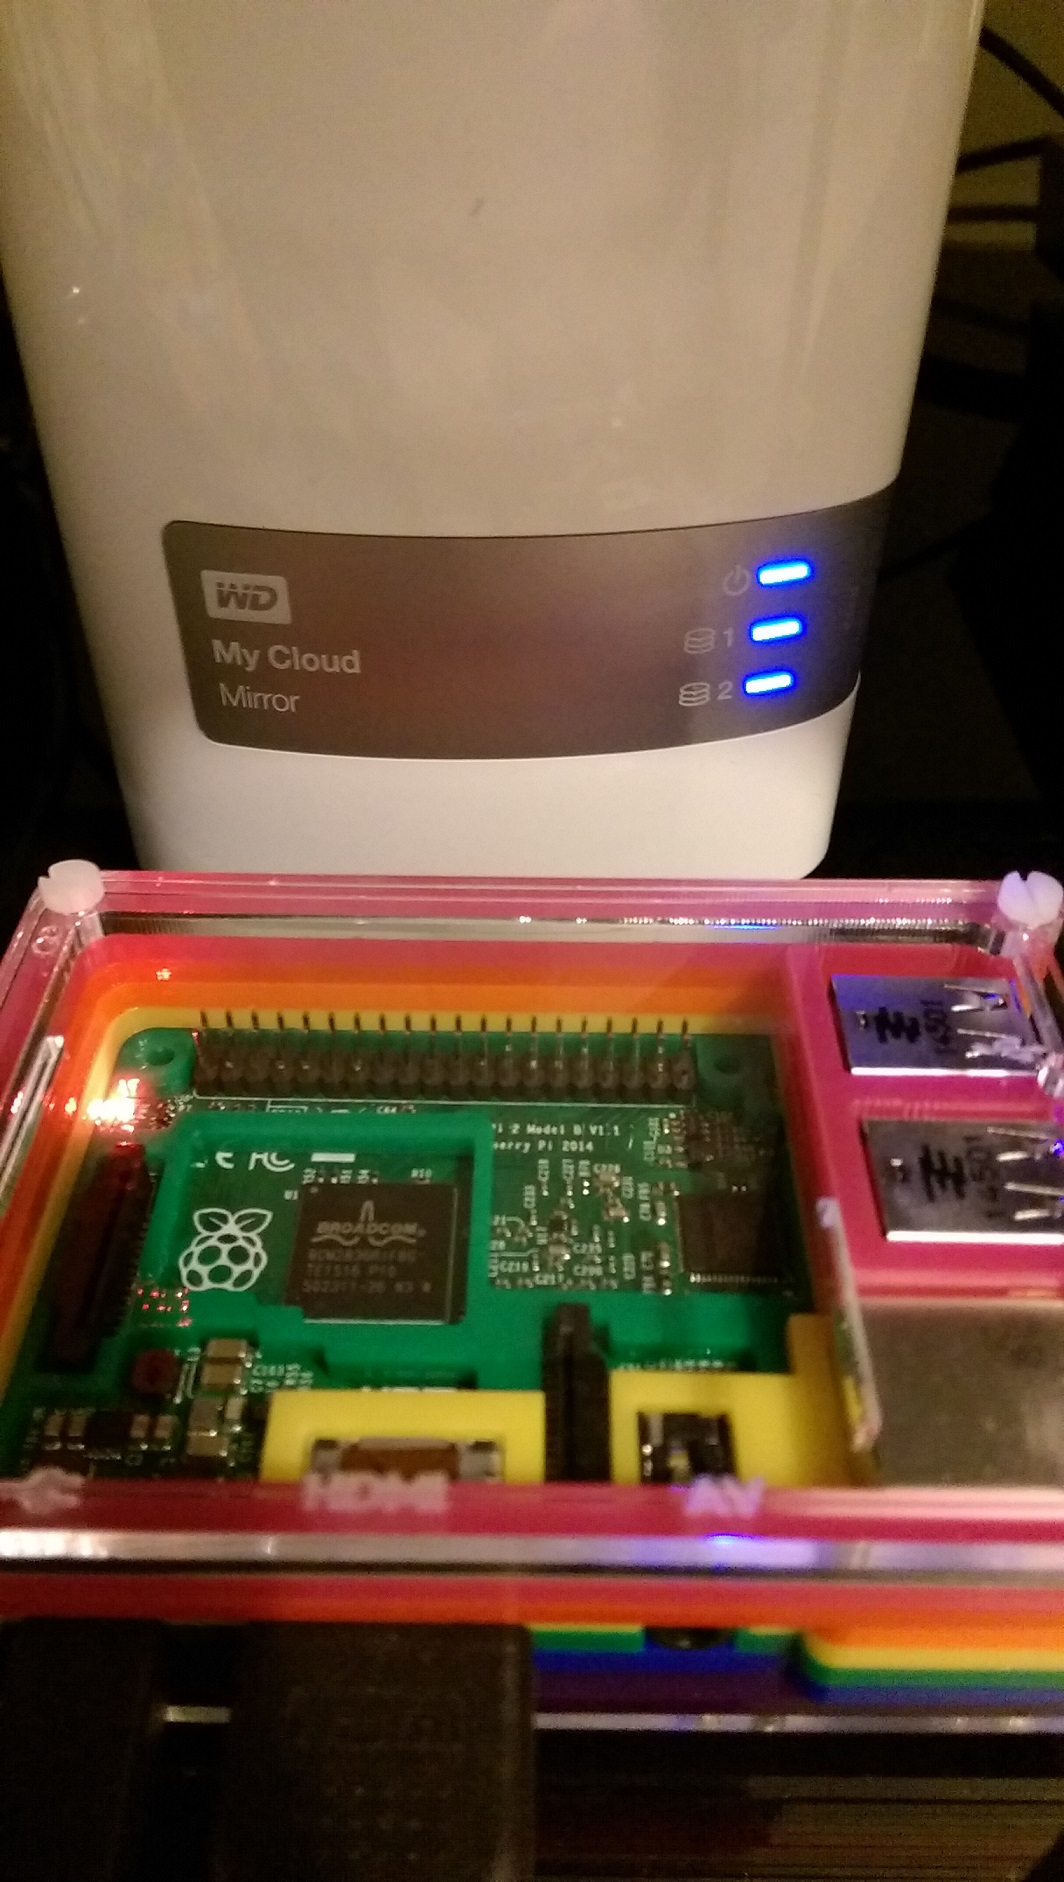
Connecting a Raspberry Pi to a WD MY Cloud Network Attached Hard Drive:

Recently during a house move, I dropped my good old reliable Raspberry Pi – hard drive Network Attached Storage unit.
Basically I connected my external hard drive to a Raspberry Pi and had a Network Attached Storage drive which allowed me to access my media from any device on my home network.

I then realised it was time to buy a dedicated NAS.

I shelled out for the WE My Cloud 4 TB server, which by all reports is a great piece of gear – however I wanted something more than a standalone NAS and I wanted to be able to access the WD My Cloud from my Pi.

Here’s how I connected my Pi to the My Cloud! The guide below should work for any NAS – not just the WD My Cloud.

Find the IP address of your NAS:

If you don’t know the IP address of your NAS, you can perform an “arp-scan” from your Raspberry Pi to find it, here’s how I found mine:

# sudo arp-scan --localnet --interface=wlan0

If you still can’t find the IP address, for the WD My Cloud you can find the IP address in your settings, as per the instructions here.

In my case my NAS IP address was: 192.168.192.62

Mounting the NAS to the Raspberry Pi:

The first step to accessing the NAS from your Raspberry Pi is to mount the external HDD as a file system on the Raspberry Pi, this will allow you to view the NAS, as you would any directory on the Pi. This is pretty easy actually, as the CIFS (CIFS Common Internet File Share, a protocol dictating how different OS’ share files between them, including Windows and Linux) protocol takes care of everything.

First make a directory for the share:

# mkdir wdmycloud

Next mount the drive using the IP address and the Raspberry Pi directory you want to mount to:

# sudo mount -t cifs -o guest //192.168.192.62/Public /home/pi/wdmycloud
mount command

mount command

In this example, I am mounting the “Public” folder located on my NAS to the wdmycloud folder located on my Raspberry Pi.

The command syntax is:
mount -t <Mount Type> -o <Access> <SOURCE> <DESTINATION>

After executing the mount command, you should now be able to access the NAS file system as you would any other directory!

Automatically mount the NAS on power up:


Edit the FSTAB to mount your NAS automatically on power up:

To make the mount permanent, we need to add the NAS file system to the Raspberry Pi’s /etc/fstab file – the File System Table.

# sudo nano /etc/fstab
Edit the FSTAB file.

Edit the FSTAB file.

Add the NAS as a file system in the FSTAB file.

//192.168.192.62/Public /home/pi/wdmycloud cifs guest     0       0
Adding the NAS to the FSTAB.

Adding the NAS to the FSTAB.

You can see from the last line in the FSTAB file above, I have added the NAS as a file system in my FSTAB file.

This will automatically mount the NAS every time you power up your Raspberry Pi!

Testing the NAS is connected automatically on power up:

First step, reboot your Pi… :

# sudo reboot
Reboot your Pi.

Reboot your Pi.


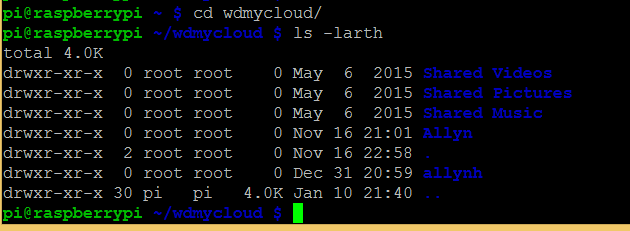
Next step, check your NAS directory from the Pi:

# cd wdmycloud
# ls -larth
Confirm the share is working.

Confirm the share is working.

Success! The mount works, I can now access all of my pictures, music and movies from my Raspberry Pi. Everything is safely stored on my WD My Cloud, which keeps 2 copies of all of my data – so if anything goes wrong, I’ll always have my data backed up 😉
 

Making a Twitter-Bot on your Galileo or Raspberry Pi

Twitter have developed an API (Application Programming Interface) for their website, which makes it really easy to send and receive Tweets from your Raspberry Pi or Galileo! The Twitter API takes all of the hard work out of writing a program to interface with Twitter, There are several ways to access the Twitter API, the easiest of which (in my opinion anyway 🙂 is to use the Twython package of the Python language.

Differences between Raspberry Pi and the Galileo:

It’s really easy to install Twython on the Raspberry Pi, a little harder to install on the Galileo – so for that reason, I’ll show the step-by-step instructions from the Galileo install. The only difference is the Galileo doesn’t require you to use the sudo command as you already have root permissions set. For example, when editing a file with the Galileo you would use:

# nano my_file.txt

When editing the file on a Raspberry Pi you would use:

# sudo nano my_file.txt

Changing the date on the Galileo:

In order to install some of these packages, you’ll need to update the date and time of your Galileo – this isn’t automatically done when you connect to the internet as you may expect. If you don’t update your date and time, you’ll get SSL certification errors when you try to download the Twython package.

To change the date and time – use the following command in the format year-month-day hour:minute:second:

# date --set="2015-01-20 10:00:00"

Installing Twython (and other Python packages):

In order to connect our computer to Twitter, we’ll need to download some Python packages:

  1. setuptools – this will allow you to “Easily download, build, install, upgrade, and uninstall Python packages.”
  2. pip – this is a  Python package installer.
  3. twython – this is the package which will actually interface with Twitter.

Here are the commands to install these packages – remember if you’re on a Raspberry Pi you’ll need to put “sudo” in front of each command.

# apt-get install python-setuptools

Here’s what that looks like on your computer, when asked “do you want to continue” as per the picture below – enter “y”. to continue.

Package 1 of 3.

Installing the setuptools Python package.

Next, install the “pip” package:

# easy_install pip

Finally, using pip – install the Twython package:

# pip install twython


Creating a Twitter App:

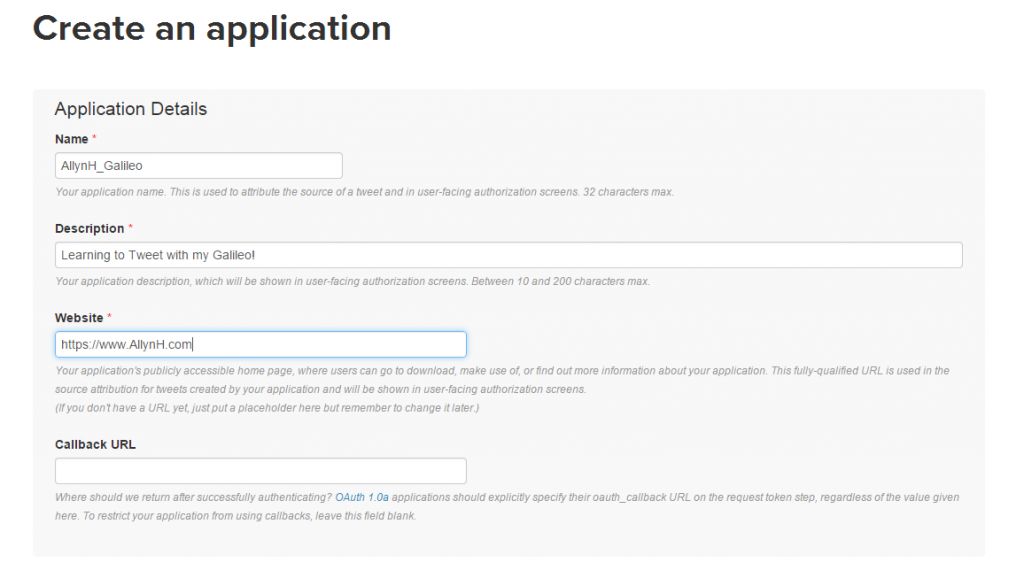
To create a Twitter App, you’ll need to sign up to Twitter and register the account as an application. This is important as you’ll need to verify this App with Twitter every time you use it. The verification method Twitter uses is called OAuth 2.0 to verify your App, this means you’ll never have to supply your password to 3rd party App developers but it does make it a little harder to verify your App – the good news is, Twython and other API’s handle all the OAuth pain, all you need to do is register your App and save the information. Register your app here: https://apps.twitter.com/ Click on “Create New App” and enter your information.

Let the fun begin!

Creating an App.


Changing App permissions:

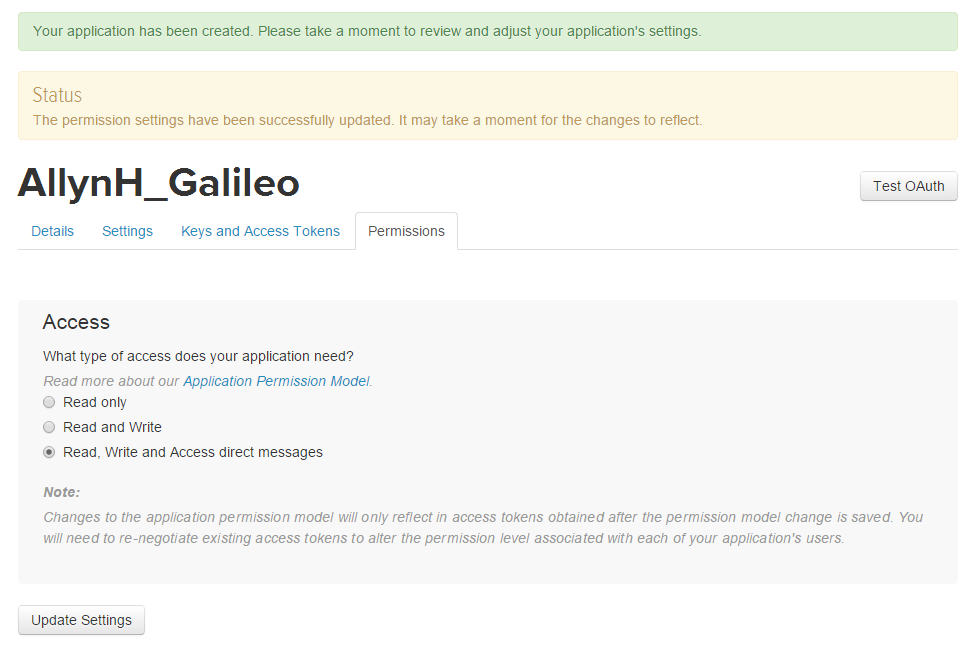
As this is your App and you’ll want to be able to play around with it – you can chance the App permissions to allow you to read, write and access your direct messages. You can change these permissions at a later stage.

Change permissions.

Change permissions.

Authorize your account:

You need to create your access token and access token secret before you use your App. Click on the “Keys and access tokens” tab. Click on the “Create my access token” button.

Generate your secret token.

Generate your secret token.

You should now have all 4 pieces of required information:

  1. Consumer Key (API key).
  2. Consumer Secret (API Secret).
  3. Access Token
  4. Access Token Secret.

Now it’s time to write some Python!

Writing the Python:

Creating a Python file:

On your Raspberry Pi or Galileo, create a file called “Tweet.py” using the following command:

# nano Tweet.py

Now paste in the Python code:

Twitter Authorization:

In order to send  a Tweet, you’ll need to send Twitter your OAuth information. This process is handled by the Twython package. Here we are creating 4 string objects and a Twython object called “twitter”. When we create the Twython object we are passing the 4 strings to it an arguments. These are the access keys you generated in the previous section.

CONSUMER_KEY = '<YOUR CONSUMER_KEY>'
CONSUMER_SECRET = '<YOUR CONSUMER_SECRET>'
ACCESS_KEY = '<YOUR ACCESS_KEY>'
ACCESS_SECRET = '<YOUR ACCESS_SECRET>'
twitter = Twython(CONSUMER_KEY,CONSUMER_SECRET,ACCESS_KEY,ACCESS_SECRET)

Reading in a command line argument:

To make the code a bit more flexible, we can pass the text we want to Tweet into the Python script as a command line argument. This is done by using the system “argv” parameter. In our case – we only want to take the first 140 characters of this text, as this is the character limit set by Twitter for each Tweet. We do that by using the command:

sys.argv[1][:140]

Executing the code:

You can execute the code from the command line like so:

# python Tweet.py "Hello world."

Here’s what that looks like on the Galileo:

First Tweet!

Hello World!

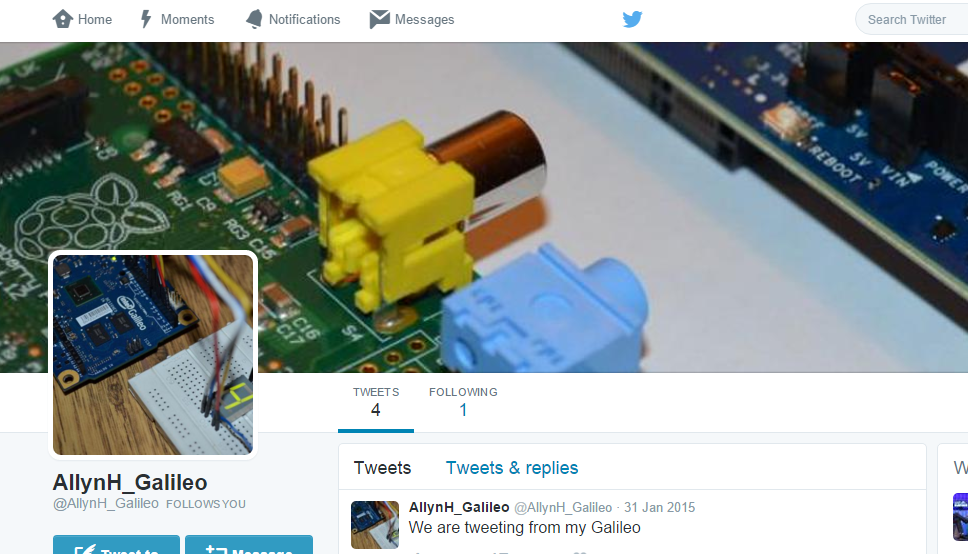
Then check your Twitter Bot!

Installing Debian on the Intel Galileo

Some of the guys in the Intel communities forum have done a great job of porting the Debian Linux distribution to the Intel Galileo. If you’re not familiar with the Debian, it is an open source operating system used on Linux systems. This is great news for the Galileo as it makes it very easy to port any Raspberry Pi based projects directly to the Galileo!

Debian was ported to the Galileo by StuartAnderson, who posted on the Intel Communities page.

You can download the Linux image from here!

What you’ll need:

  1. Galileo.
  2. SD card.
  3. Serial cable.

Downloading the Galileo Debian disk image:

You can find the Galileo Debian image here. Click on the “SD card image” file. This will take some time as the file is 900MB. While the disk image is downloading, we can prepare the SD card.

Formatting your SD Card:

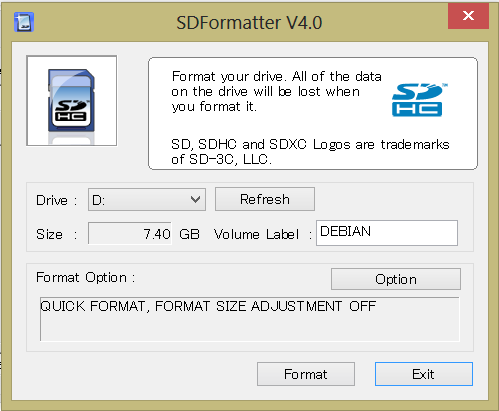
If your SD card has been used to write a Linux image before (used for a Raspberry Pi or Galileo Little Linux image), Windows can have trouble formatting the SD card. This is because Windows can only see the FAT32 partition and won’t see the much bigger Linux partition.

For this reason I used the SDformatter program from the SD Association, you can find it here (Click on Windows or Mac on the left).

You can see from the picture, I’m using an 8GB SD card (7.4GB shown but it’s 8GB, it’s normal for SD cards to be about 10% smaller than the advertised disk size), in my case Windows format only saw 56MB of the disk and ignored the remaining 7.35GB! However with the SD Formater program the full 7.4GB can be seen and will be formatted. Click on the Format button to start the process.

...

Using Rawrite32 to write the Galileo Debian disk image.

Writing the Debian Image to an SD card:

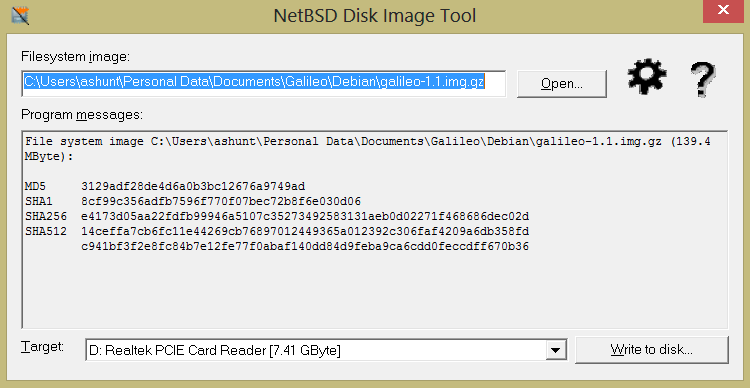
To write the Linux Debian image to the SD card you’ll need to download a disk image tool, as recommended by the original creators, I used the Rawrite32 Disk Image Tool software, found here.

After you’ve downloaded the Debian image, open Rawrite32 and select the Debian image to write.

Whoop - Debian!!!

Writing the Galileo Debian image.

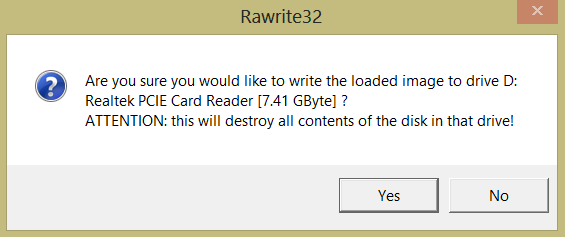
You’ll see a pretty scary warning like this, but as long as you’re sure there’s no important data on the SD card that you need, go ahead and click “Yes”!

Alt text for this picture.

Click OK to start writing the Disk Image.

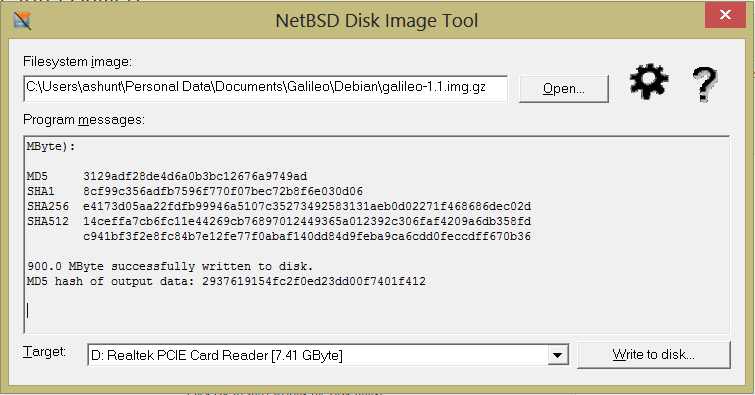
Once the Disk Image tool has finished writing – you’ll see something like this:

...

Finished writing the image.

You can see from the image above, the image file takes up 900MB, less than 1GB of my 7.4GB SD card. This means that the remaining 6.5GB of space on the SD card will not be available to me when I try to the Linux image. In order to make the remaining 6.5GB of space available, we need to grow the size of our partition on the SD card.

Now that we have a Debian Linux system available – this can be done from the Galileo itself!

Expanding the filesystem:

To expand the filesystem, first we need to expand the partition, then expand the file system to fill that partition.

When formatting the SD card, we could see that the 8GB SD card had a size of 7.4GB, so I’m going to expand my partition to 7.4GB just to be on the safe side.

Disk size before partitioning:

Not enough room!

Before resizing the filesystem.

Expanding the partition:

To resize the partition, we are going to use a program called Parted. This can be used to create, resize, move and destroy disk partitions. The first command used is the resizepart command.

# parted /dev/mmcblk0 resizepart 2

Select “y” to continue and then enter the size of the partition you want to create, here’s where I entered the 7.4GB (which works out as 7400MB).

# parted /dev/mmcblk0 resizepart 2

# parted /dev/mmcblk0 resizepart 2

You’ll need to reboot here!

# reboot

Expanding the filesystem:

When the partition has been resized we create a journal inode.

# tune2fs -j /dev/mmcblk0p2

# tune2fs -j /dev/mmcblk0p2

You’ll need to reboot here!

# reboot

When the reboot has finished, finish by expanding the filesystem to the partition size.

# resize2fs /dev/mmcblk0p2

# resize2fs /dev/mmcblk0p2

The resize2fs will expand the filesystem to fill the partition, this will take about 10 minutes but when it’s finished you should see a message like this, above.

Disk size after expanding the filesystem:

Loads of room!

Disk size after expanding the partition.

From the above image you can see, we’ve grown the filesystem to fill the partition, so we now have a total disk size of 6.8GB, with 6GB available to play with!

Now that the filesystem is expanded, it’s a good idea to update the system.

apt-get update && apt-get dist-upgrade

The update and upgrade will take about 10 minutes, then you can have fun playing with your new Debian computer.

© 2024 Allyn H

Theme by Anders NorenUp ↑