Some of the guys in the Intel communities forum have done a great job of porting the Debian Linux distribution to the Intel Galileo. If you’re not familiar with the Debian, it is an open source operating system used on Linux systems. This is great news for the Galileo as it makes it very easy to port any Raspberry Pi based projects directly to the Galileo!
Debian was ported to the Galileo by StuartAnderson, who posted on the Intel Communities page.
You can download the Linux image from here!
What you’ll need:
- Galileo.
- SD card.
- Serial cable.
Downloading the Galileo Debian disk image:
You can find the Galileo Debian image here. Click on the “SD card image” file. This will take some time as the file is 900MB. While the disk image is downloading, we can prepare the SD card.
Formatting your SD Card:
If your SD card has been used to write a Linux image before (used for a Raspberry Pi or Galileo Little Linux image), Windows can have trouble formatting the SD card. This is because Windows can only see the FAT32 partition and won’t see the much bigger Linux partition.
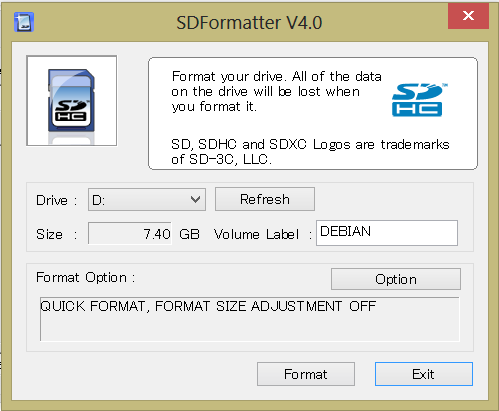
For this reason I used the SDformatter program from the SD Association, you can find it here (Click on Windows or Mac on the left).
You can see from the picture, I’m using an 8GB SD card (7.4GB shown but it’s 8GB, it’s normal for SD cards to be about 10% smaller than the advertised disk size), in my case Windows format only saw 56MB of the disk and ignored the remaining 7.35GB! However with the SD Formater program the full 7.4GB can be seen and will be formatted. Click on the Format button to start the process.
Using Rawrite32 to write the Galileo Debian disk image.
Writing the Debian Image to an SD card:
To write the Linux Debian image to the SD card you’ll need to download a disk image tool, as recommended by the original creators, I used the Rawrite32 Disk Image Tool software, found here.
After you’ve downloaded the Debian image, open Rawrite32 and select the Debian image to write.
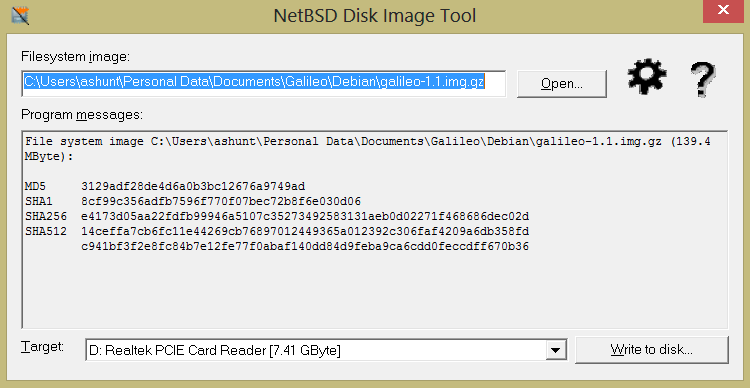
Writing the Galileo Debian image.
You’ll see a pretty scary warning like this, but as long as you’re sure there’s no important data on the SD card that you need, go ahead and click “Yes”!

Click OK to start writing the Disk Image.
Once the Disk Image tool has finished writing – you’ll see something like this:
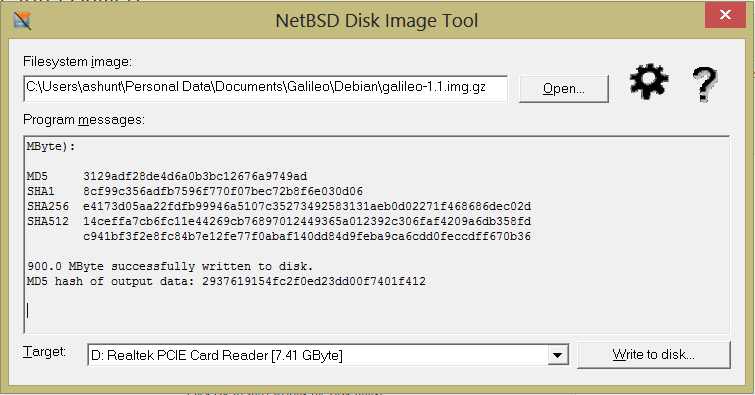
Finished writing the image.
You can see from the image above, the image file takes up 900MB, less than 1GB of my 7.4GB SD card. This means that the remaining 6.5GB of space on the SD card will not be available to me when I try to the Linux image. In order to make the remaining 6.5GB of space available, we need to grow the size of our partition on the SD card.
Now that we have a Debian Linux system available – this can be done from the Galileo itself!
Expanding the filesystem:
To expand the filesystem, first we need to expand the partition, then expand the file system to fill that partition.
When formatting the SD card, we could see that the 8GB SD card had a size of 7.4GB, so I’m going to expand my partition to 7.4GB just to be on the safe side.
Disk size before partitioning:
Before resizing the filesystem.
Expanding the partition:
To resize the partition, we are going to use a program called Parted. This can be used to create, resize, move and destroy disk partitions. The first command used is the resizepart command.
# parted /dev/mmcblk0 resizepart 2Select “y” to continue and then enter the size of the partition you want to create, here’s where I entered the 7.4GB (which works out as 7400MB).

# parted /dev/mmcblk0 resizepart 2
You’ll need to reboot here!
# rebootExpanding the filesystem:
When the partition has been resized we create a journal inode.
# tune2fs -j /dev/mmcblk0p2
# tune2fs -j /dev/mmcblk0p2
You’ll need to reboot here!
# rebootWhen the reboot has finished, finish by expanding the filesystem to the partition size.
# resize2fs /dev/mmcblk0p2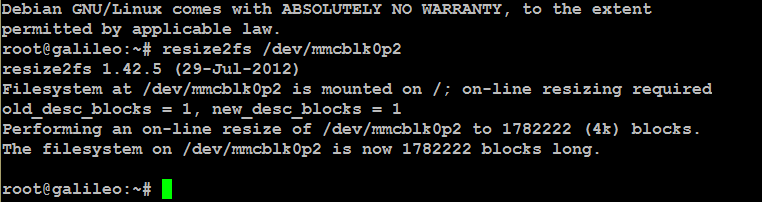
# resize2fs /dev/mmcblk0p2
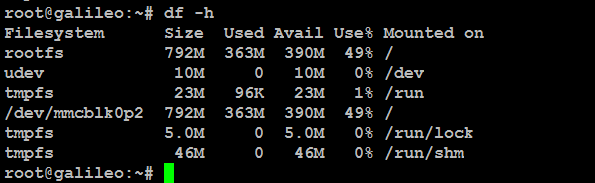
The resize2fs will expand the filesystem to fill the partition, this will take about 10 minutes but when it’s finished you should see a message like this, above.
Disk size after expanding the filesystem:
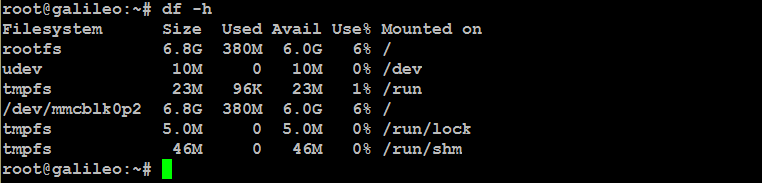
Disk size after expanding the partition.
From the above image you can see, we’ve grown the filesystem to fill the partition, so we now have a total disk size of 6.8GB, with 6GB available to play with!
Now that the filesystem is expanded, it’s a good idea to update the system.
apt-get update && apt-get dist-upgrade
The update and upgrade will take about 10 minutes, then you can have fun playing with your new Debian computer.
You can’t apt-get update && apt-get dist-upgrade, right? The last time I checked, glibc was producing segfaults (atleast with ssh server). Only way was to `apt-mark hold` the package. Is it working fine now?
Hi Wdev,
Sorry for taking so long to get back to you!
I’ve just finished a house move, so don’t have my Galileo to hand but looking through my notes both apt-get update and apt-get dist-upgrade worked for me.
The guy who ported Debian to the Galileo – StuartAnderson, posted about it on the Intel communities page:
https://communities.intel.com/message/251455#251455
Looks like he’s even solved some of the issues I’ve highlighted above, such as resizing the SD card.
Have you tried the Galileo Debian build?
Let me know if you have any other questions!