
Creating a Web Server using the Arduino IDE example:
The Arduino IDE comes with a prebuilt Web Server example. If you’re not sure what a Web Server is, or what it’s used for – check out my blog post here -> Creating a Web Server on the Galileo
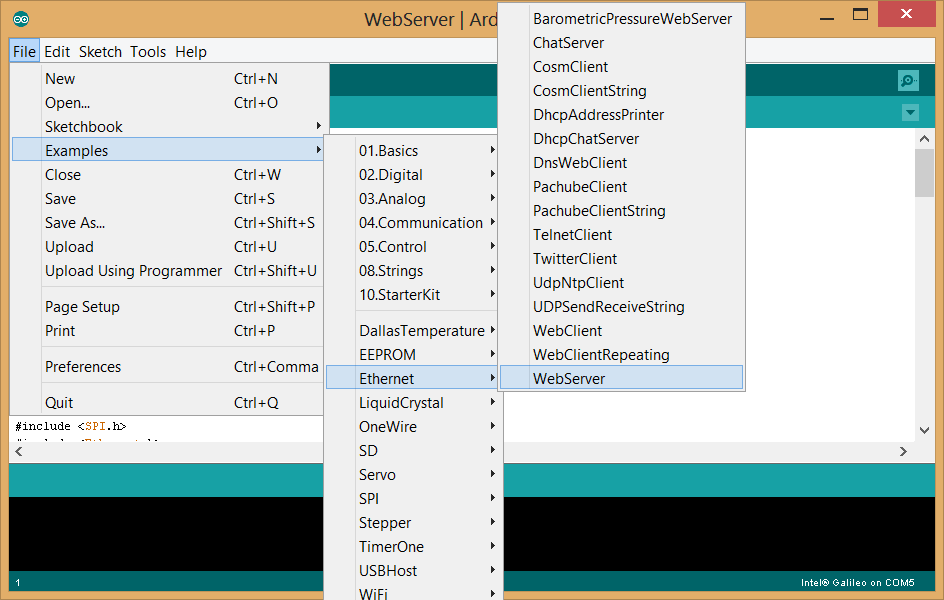
Arduino Example for creating a Web Server.
The above example comes with enough code to:
- Create a Web Server on the given IP address.
- Create a blank HTML page.
- Read the analogue inputs and display their values on the HTML page.
How the Arduino Web Server works:
The Web Server uses the Arduino Ethernet library to answer any HTTP requests made to the Galileo. The Galileo already has an Ethernet connection on board and fully supports the Ethernet library.
Here’s how the library is explained on the Arduino website:
The library allows the Arduino device to connect to the internet. It can serve as either a server accepting incoming connections or a client making outgoing ones. The library supports up to four concurrent connection (incoming or outgoing or a combination).
The Arduino example does not conform to the full HTML page structure, and instead relies on printing text between the opening and closing HTML tags.
This is not the ideal solution for creating a fully functioning HTML page but it is a very quick and easy way to control your Galileo via a web browser. The example is pretty bare-bones, a HTML only website with no CSS styling or server side scripting functionality. Without any JavaScript or PHP, your page needs to be refreshed anytime the data changes.
Creating the Web Server in the Arduino IDE:
We start the Web Server by initialising the Ethernet class, to do this we need to call the Ethernet.begin() function and pass the required MAC and IP addresses to the function.
byte mac[] = { 0xDE, 0xAD, 0xBE, 0xEF, 0xFE, 0xED };
IPAddress ip(192,168,1,177);

void setup() {
//  Ethernet.begin(0xDE, 0xAD, 0xBE, 0xEF, 0xFE, 0xED, 192,168,1,177);
    Ethernet.begin(mac, ip);
}
Once the Ethernet class has been initialised, we need to tell the server to listen for incoming connections on port 80, this is the default port for HTML requests, you can change this port number, which I will be doing in the Node.js example.
EthernetServer server(80);

void setup() {
  server.begin();
}
When the server is running and a client is available (connected via a web browser), the client.println() function is used to send data to all the connected devices. HTML can be printed directly using the client.println() function.
void loop() {
  client.println("<title> Allyns webserver: </title>");
}
The above code can be used to build a fully functioning Web Server.
Note:
At the time of writing there is a bug in the Arduino Ethernet library, which is discussed and a fix is suggested here.