Introduction:
In the previous sections I showed how to:
- Send a request to read Xurs inventory.
- Send a HTML formatted email with Xurs inventory.
- Log into Destiny and Bungie.net via your PSN account.
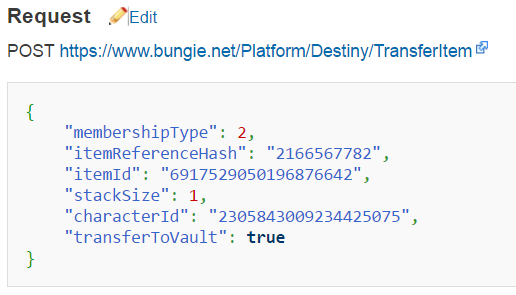
- Transfer items from your vault to your character and equip them.
In this section I’m going to lay the foundations of a full inventory management system. This section will detail how to read the list of items that are currently equipped on your character and how to read the contents of your vault.
I’ll also show how, by downloading the full Destiny Manifest, we can speed up our code and drastically reduce the amount of HTTP requests we need to send to Bungie.
Also, I like to say a big thanks to all of the people on Reddit, Twitter and Bungie.net for their help and interest 🙂
You can find me on Twitter here @Allyn_H_
The getCharacterInventory endpoint:
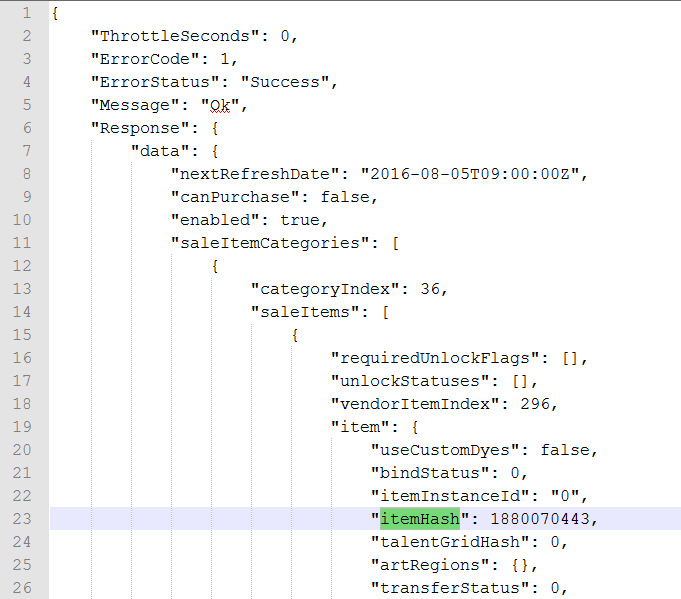
The BungieNetPlatform wiki for this endpoint can be found here. This endpoint will return a JSON response with a list of each of the equipped items for a given character ID. It works in a similar way to the Xur adviser endpoint (seen in parts 1 & 2). The request will return a series of encoded hashes, which we’ll then need to send as a series of separate requests to query the Destiny manifest, in order to decrypt this data into a human readable format.
- This is a public endpoint – no need to be logged in, anyone can use this.
- This a HTTP GET request – you don’t need to send a JSON package.
- Your destinyMembershipId needs to be attached to the URL as a parameter – more info here.
- Your characterId needs to be attached to the URL as a parameter – more info here.
Making the request:
First we build the endpoint URL and make the GET request:
base_url = "https://www.bungie.net/platform/Destiny/"
req_string = base_url + membershipType + "/Account/" + destinyMembershipId + "/Character/" + charId + "/Inventory"
res = session.get(req_string)
The request URL will look like this:
https://www.bungie.net/platform/Destiny/2/Account/4611686018436136301/Character/2305843009222916165/Inventory/
Parsing the response:
Next we need to parse through the multidimensional JSON response and pick out the relevant data:
for equipment in res.json()['Response']['data']['buckets']['Equippable']:
    for item in equipment['items']:
        print "itemHash is: \t\t", item['itemHash']
        print "itemInstanceId is: \t", item['itemInstanceId']
        hashReqString = base_url + "Manifest/6/" + str(item['itemHash'])
        res2 = requests.get(hashReqString, headers=HEADERS)
        item_name = res2.json()['Response']['data']['inventoryItem']['itemName']
        item_tier = res2.json()['Response']['data']['inventoryItem']['tierTypeName']
        item_type = res2.json()['Response']['data']['inventoryItem']['itemTypeName']
        item_icon = res2.json()['Response']['data']['inventoryItem']['icon']
        print "Item name is: " + item_name
        print "Item type is: " + item_tier + " " + item_type
        print "Item icon is: http://www.bungie.net" + item_icon
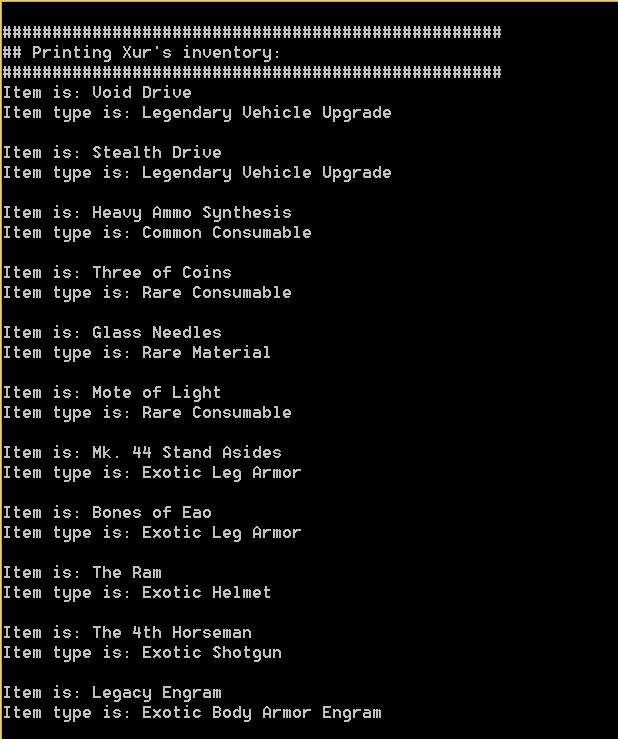
The above code will read through the large JSON response and print out the data we want. For each item in our inventory, we will print out the items name, its type, the tier type (common, legendary or exotic) its description and its icon. The dict item [‘Equippable’] is an array, so we need to loop through each piece of “equipment” and pick out each of the [‘items’] stored there.
The code will return something like this:
itemHash is: 1703777169
itemInstanceId is: 6917529081613012276
Item name is: 1000-Yard Stare
Item type is: Legendary Sniper Rifle
Item icon is: http://www.bungie.net/common/destiny_content/icons/c1c49acd0fd146d7b32184f23c64dfe5.jpg
The GetVault endpoint:
The BungieNetPlatform wiki for this endpoint can be found here. This endpoint also works in a similar way to the Xur adviser endpoint (seen in parts 1 & 2) and the getCharacterInventory endpoint, it will return a series of encoded hashes, which we’ll then need to send as a series of separate requests to query the Destiny manifest. If our vault was full, we currently have space for 288 items. This means we’ll need to make 289 (1 request to the vault + 288 requests to decrypt items ) requests to the Bungie servers to get all the data we want! Making that many requests takes way too much time and eats way too much data, I’ll explain how to remove these requests in a bit 🙂
- This is a private endpoint – you need to be logged in, with a persistent HTTP session.
- This is a GET request – you don’t need to send a JSON package.
- Your destinyMembershipId needs to be attached to the URL as a parameter – more info here.
Making the request:
The code for this request will look like this:
getVault_url = base_url + membershipType + "/MyAccount/Vault/"
res = session.get(getVault_url, params={'accountId': destinyMembershipId})
Parsing the response:
Next we need to parse through the multidimensional JSON response and pick out the relevant data:
for bucket in vaultResult.json()['Response']['data']['buckets']:
    for item in bucket['items']:
        print item['itemHash']
        print item['itemInstanceId']
        hashReqString = base_url + "Manifest/6/" + str(item['itemHash'])
        res2 = requests.get(hashReqString, headers=HEADERS)
        myItem = item['itemHash']
        item_name = res2.json()['Response']['data']['inventoryItem']['itemName']
        item_tier = res2.json()['Response']['data']['inventoryItem']['tierTypeName']
        item_type = res2.json()['Response']['data']['inventoryItem']['itemTypeName']
        item_icon = res2.json()['Response']['data']['inventoryItem']['icon']
        print "Item name is: " + item_name
        print "Item type is: " + item_tier + " " + item_type
        print "Item icon is: http://www.bungie.net" + item_icon
The above code will read through the large JSON response and print out the data we want. For each item in our inventory, we will print out the items name, its type, the tier type (common, legendary or exotic) its description and its icon. The dict item [‘buckets’] is an array, so we need to loop through each “bucket” and pick out each of the [‘items’] stored there. The [‘buckets’] item is a storage category in your vault, such as Armour, Weapons, Consumables, Shaders, Emblems, etc. Each of the [‘items’] refers to the item stored in that vault space.
It’s also important to remember, we need to collect the “itemInstanceId” for each item, as this is required to transfer the item to and from the vault.
hashReqString = base_url + "Manifest/6/" + str(item['itemHash'])
res2 = requests.get(hashReqString, headers=HEADERS)
The above lines makes each of the requests to the manifest to decrypt the “itemsHash” into a human readable format. This request is made for each of the items in our vault. This is the real time consuming part of the program.
Downloading the manifest:
So we’ve figured out how to find our vault contents and list the equipped items on our characters. We’ve also seen, for decrypting and reading the contents of our vault, we need to make 289 requests (more if Bungie ever decide to increase the vault capacity). This takes a huge chunk of time. I measured the amount of time it took to read my inventory and to send 267 requests (I had 266 items in my inventory), the script took 2 mins and 43 seconds to finish!
So in order to speed things up, I downloaded the Destiny Manifest database onto my local computer, the code and directions can be found here on the destiny devs page.
The code can be downloaded here.
Once downloaded you can execute the code like so:
python manifest_destiny.py
The output looks something like this:
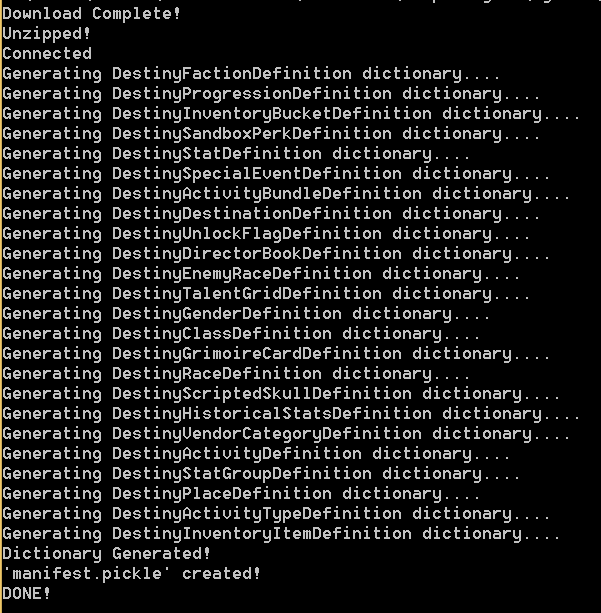
Output of the script used to download the Destiny Manifest.
This will download the full Manifest and store it in a Pickle file. This is also my first time using Pickle files, so I assume this is done as it’s easier to get the data from a Pickle file than an SQL database.
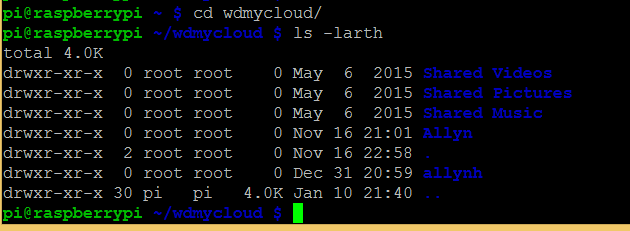
Here’s what they look like:

Copies of the Destiny Manifest and the Manifest as a Pickle file.
The files are 53MB and 71MB, so they’re big enough. The file sizes can be reduced by commenting out any of the Manifest items you don’t need – for example I downloaded second copy of the Manifest with only the “itemHash” data included.
Here’s how I edited the code:
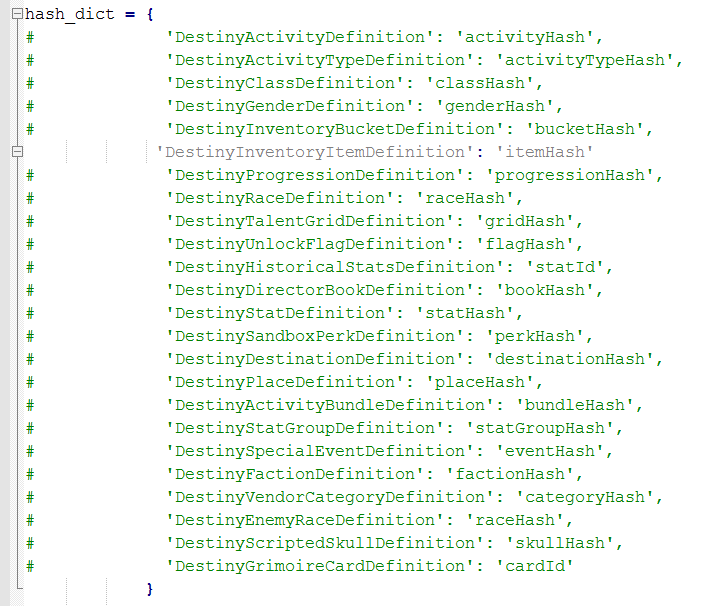
Changing the code to download only the itemHash data.
Here are the file sizes:

Copies of the itemHash manifest and Pickle file.
We can see here, the Pickle file we need has reduced from 71MB to 37MB. This would also further reduce the run time of our programs. As memory isn’t really an issue for me I will be sticking to the full Manifest.
Reading the vault contents using the manifest:
Now that we have saved the Manifest as a Pickle file, we can pull the required data directly from this file instead of needing to make hundreds of HTTP requests every time we want to read our inventory or our vault contents.
To import the data from our Pickle file we use the following code:
import pickle

with open('manifest.pickle', 'rb') as data:
    all_data = pickle.load(data)
Now the object all_data will contain the entire Manifest contents.
Previously we made requests to the Manifest via a HTTP request:
hashReqString = base_url + "Manifest/6/" + str(item['itemHash'])
res2 = requests.get(hashReqString, headers=HEADERS)
myItem = item['itemHash']
item_name = res2.json()['Response']['data']['inventoryItem']['itemName']
Where we pass the parameter “6”, which refers to the definition type “InventoryItem” and the specific “itemHash”.
Now we can read the item information from the nested dict object stored in all_data:
inventoryItem = all_data['DestinyInventoryItemDefinition'][item['itemHash']]
item_name = inventoryItem['itemName']
Updating the code to pull from our local Manifest copy:
Here’s how I modified the code used to parse our vault to pull the data directly from our manifest.pickle file instead of making a HTTP request:
for bucket in vaultResult.json()['Response']['data']['buckets']:
    for item in bucket['items']:
        weapon_list[array_size]['itemReferenceHash'] = item['itemHash']
        weapon_list[array_size]['itemId'] = item['itemInstanceId']
        inventoryItem = all_data['DestinyInventoryItemDefinition'][item['itemHash']]
        item_name = inventoryItem['itemName']
        item_tier = inventoryItem['tierTypeName']
        item_type = inventoryItem['itemTypeName']
        item_icon = inventoryItem['icon']
        print "Item name is: " + item_name
        print "Item type is: " + item_tier + " " + item_type
        print "Item icon is: http://www.bungie.net" + item_icon
Run time improvements:
We can see from the table below that downloading the Manifest and removing the need for ~290 additional HTTP requests can drop the run time from 220 seconds down to 16 seconds. A lot of 16 seconds seems to be from parsing the Pickle file, which again could be optimised by either using the raw SQL data or storing it in some other format. For now though the convenience of using the Pickle file far out weighs the downsides.
|
Manifest Type: |
Run time: |
| Multiple HTTP requests to Bungie Manifest | 220.0 seconds |
| manifest.pickle – full download | 22.3 seconds |
| item.pickle – only item | 16.2 seconds |
Viewing the vault contents as a HTML file:
As a quick and easy way of outputting the vault contents into a HTML file, I used the same template file and code format as used in the guide for emailing Xurs inventory.
Here are the steps:
- Append the HTML header to the top of the my_html string.
- Modify the code used to parse the vault contents to output a HTML formatted string.
- Append the HTML footer to the bottom of the my_html string.
- Concatenate the header, vault contents and footer HTML strings into the my_html string and output this to a file called vault_contents.html.
Parsing the response as HTML:
for bucket in vaultResult.json()['Response']['data']['buckets']:
    for item in bucket['items']:
        inventoryItem = all_data['DestinyInventoryItemDefinition'][item['itemHash']]
        item_name = inventoryItem['itemName']
        item_tier = inventoryItem['tierTypeName']
        item_type = inventoryItem['itemTypeName']
        item_icon = "http://www.bungie.net/" + inventoryItem['icon']
        print "Item name is: " + item_name
        array_size += 1
        print "Item is: " + item_name
        print "Item type is: " + item_tier + " " + item_type + "\n"
        my_html = my_html + "\t\t<div class=\"col-md-4\">\n"
        my_html = my_html + "\t\t\t<div class=\"thumbnail\">\n"
        my_html = my_html + "\t\t\t\t<a href=\"" + item_icon + "\">\n"
        my_html = my_html + "\t\t\t\t<img src=\"" + item_icon + "\">\n"
        my_html = my_html + "\t\t\t\t</a>\n"
        my_html = my_html + "\t\t\t\t<h3>" + item_name + "</h3>\n"
        my_html = my_html + "\t\t\t\t<p>" + item_tier + " " + item_type + "</p>\n"
        my_html = my_html + "\t\t\t</div>\n"
        my_html = my_html + "\t\t</div>\n"
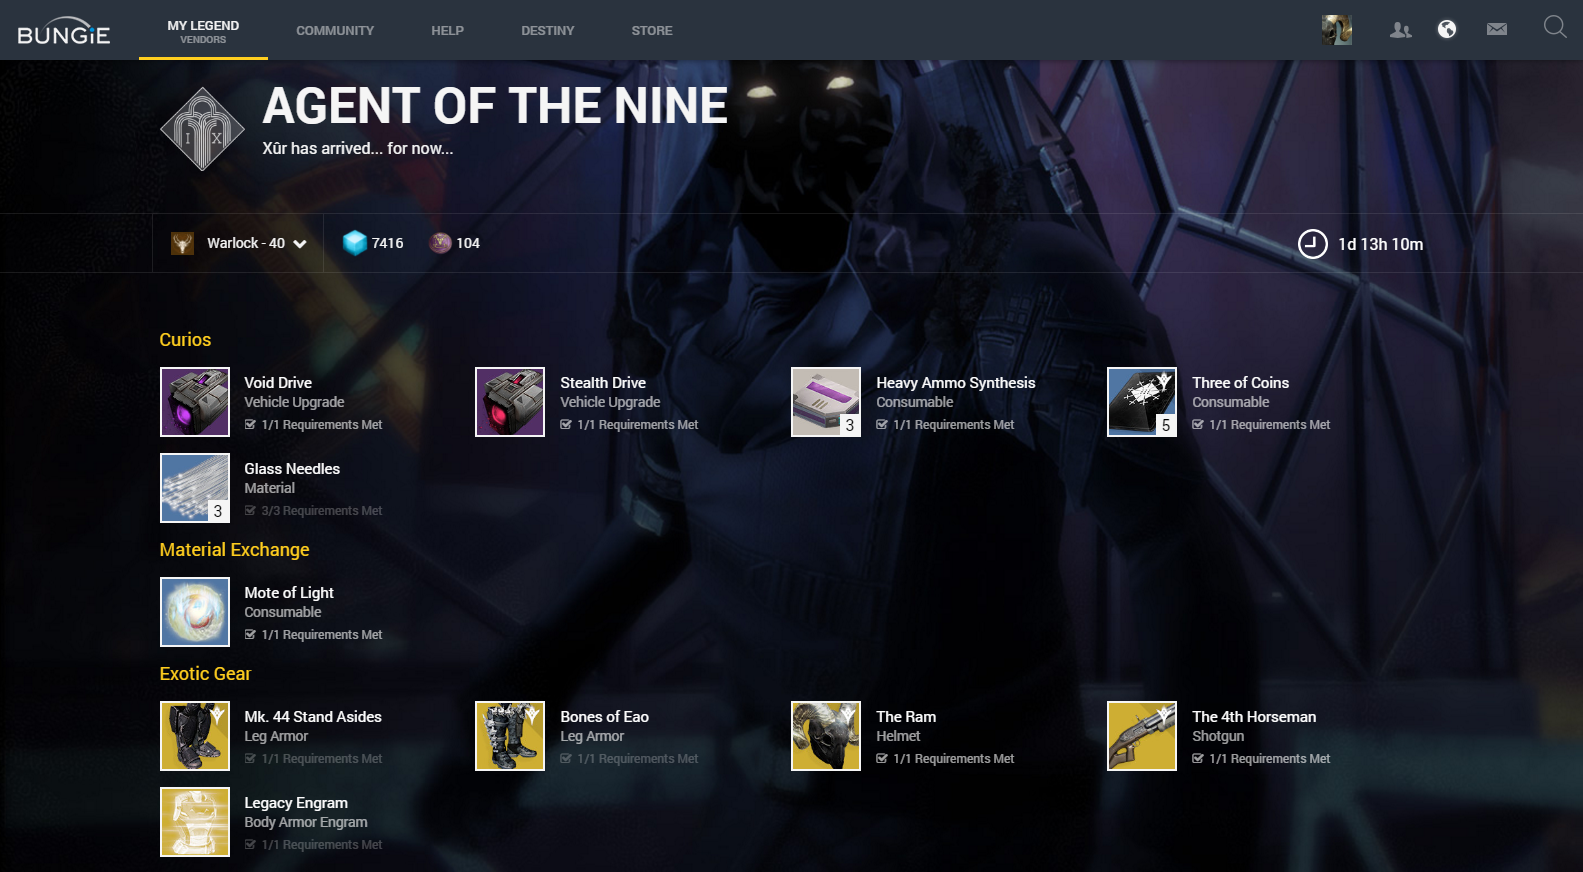
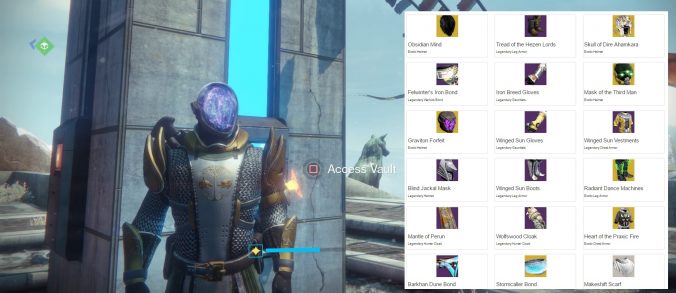
Here’s what the output of the code looks like:
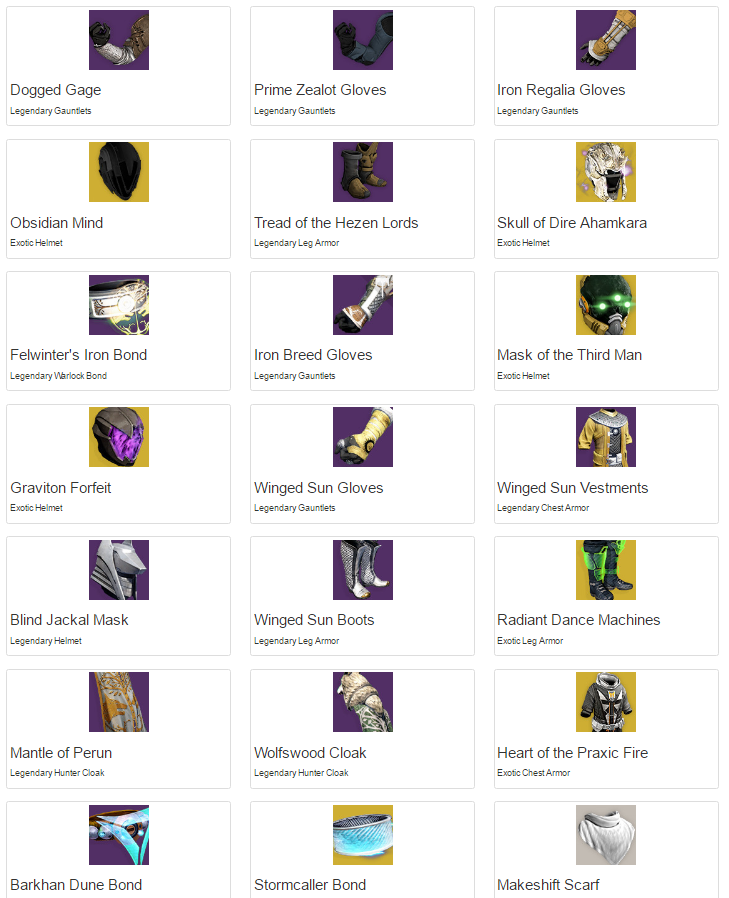
Vault contents as formatted HTML.
Running the code:
The full set of Python code can also be found on my GitHub page here: https://github.com/AllynH/Destiny_Read_Characters_Inventory_Vault
As there are a few files you’ll need to copy it from there,. In order to make the code work for you – you’ll need to input your username, password, api_key, destinyMembershipId and characterId in the Header_file.py.
Here are the values you’ll need to change:
# PSN Username:
username = emailaddr
password = mypassword

# Destiny API X-Key:
API_KEY = ""

# Destiny parameters:
membershipType = "2" # PS4 = 2
destinyMembershipId = ""

characterId = ""
You can then run the code like so:
> python Read_Inventory_and_Vault.py
As always, I’ll try to keep the GitHub repo up to date with any changes I make.
Next steps:
The code as it is, does what we want, reads the contents of our vault and prints it to a HTML file, but it’s not really a fully functioning inventory management system.
To create a fully working web application the code will need to be built into a web framework, luckily for me I’ve been reading up on the Python Flask web framework for the last few weeks 🙂