Introduction:
In my previous blog posts, I’ve been working to build a wep app based on Bungies API for Destiny the game. I’ve made great progress with the server side requests and processing the data responses from Bungie, the next steps are to integrate this code into a web server. This will also work out well as I move my code over to the new Bungie OAuth fow.
After a bit of research, I’ve decided to go with the Flask microframework. As their tag line suggests, Flask is a very light weight microframework and appears to be a little easier than Django to setup for smaller projects. In order to learn more about Flask, I’ve been working from Miguel Grinbergs book and his massive online tutorial, both of which I would highly recommend. This blog post is designed as a general overview of Flask, Jinja2, Python as there are many other better thought out learning material on these subjects I’d like to get stuck into the OAuth and adding Destiny features into the code.
If you’d like to review the previous Destiny API posts, check them out here:
- Send a request to read Xurs inventory.
- Send a HTML formatted email with Xurs inventory.
- Log into Destiny and Bungie.net via your PSN account.
- Transfer items from your vault to your character and equip them.
- Reading a characters inventory and vault contents.
Hello World:
To get started, lets start with the “Hello World!” example on the Flask homepage.
from flask import Flask
app = Flask(__name__)

@app.route("/")
def hello():
    return "Hello World!"

if __name__ == "__main__":
 app.run()
What the code is doing:
from flask import Flask
app = Flask(__name__)
We are importing the Flask Class from the flask package. We then create an instance of a Flask object and name it “app”. We pass “__name__” as the first parameter to our Flask object, this is the “import_name” parameter and you can read more about it here.
@app.route("/")
def hello():
    return "Hello World!"
The @app.route() decorator is used to tell Flask what URL will trigger our function. In this case, a visitor to our homepage will trigger the function hello(). Within the hello() function, we are returning the string “Hello World!”.
if __name__ == "__main__":
    app.run()
When you execute the Python code from the command line, “__name__” will be set to “__main__”, this will execute the code to run our instance of the Flask object, called “app”.
When we execute the code it will print something like this to the screen:
> python app.py
* Running on http://127.0.0.1:5000/ (Press CTRL+C to quit)
127.0.0.1 - - [25/Jan/2017 12:45:43] "GET / HTTP/1.1" 200 -
127.0.0.1 - - [25/Jan/2017 12:45:43] "GET /favicon.ico HTTP/1.1" 404 -
When we navigate to address in our browser we will see this:
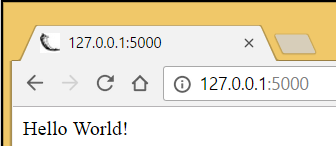
This is what our app looks like in our web browser.
If we view the source of the web page (Right mouse button -> View source), we can see. There is no HTML displayed, just the string “Hello World!”:
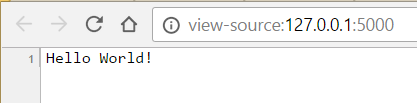
No HTML here – just a string.
This is a good start, we have created a web server with 7 lines of code.
Adding features to our server:
Now that we have a very basic web server up and running, lets add some features.
Flask_script Manager:
Flask Manager provides support for writing external scripts in Flask, in our case it will allow us to add parameters for the server directly from the command line. This will allow us to switch between debug mode and production mode, or to change the port and host IP numbers directly from the command line.
Here’s how we create a Manager instance and link it to our “app” object:
from flask_script import Manager
manager = Manager(app)
We can then restart our web server like so:
> python hello.py runserver
Or we could start on a different port like this:
> python hello.py runserver -p 5001
Which would return:
* Running on http://127.0.0.1:5001/ (Press CTRL+C to quit)
Flask-Bootstrap:
If you’re not familiar with HTML or web development, Bootstrap is a free web framework for designing websites. Bootstrap contains HTML and CSS templates used to design web pages. It really takes a lot of the pain out of designing websites 🙂
For more info on Python-Bootstrap, see here.
Here’s how we import Bootstrap into our app:
from flask_bootstrap import Bootstrap

bootstrap = Bootstrap(app)
This will allow us to create Bootstrap based designs by adding the following to our base.html template file (I’ll talk about this more in a minute):
{% extends "bootstrap/base.html" %}
HTML with the Jinja2 template engine:
In my previous posts, I’ve used a series of the file.write() commands to take the JSON response, format it as HTML , with a bit of hacking, and write it to a HTML file. This is OK for small scale programs, like the one where I send Xurs inventory as a HTML formatted email. It’s not really suitable for large scale projects, or any sort of project where you’ll be displaying multiple pages of content.
A template file is a text file that contains the response from our server, we can control the flow and contents of the template file by using Jinja2’s inbuilt Control Statements. First, let’s change the above code from returning a string – to returning a rendered Jinja2 template.
from flask import Flask, render_template

@app.route("/") def hello():
    message = "Hello, World!"
    return render_template('index.html', message=message)
In the above code, instead of just returning the string “Hello, World!”, we are passing the Python string to the Jinja2 engine, which then renders the index.html template using the data our Python sends.
Before we build the index.html template, we can strip out all of the generic HTML code, that is reused for each page, and keep that in a base template file. This base.html template will contain our HTML <head></head> data, our CSS links, and our navigation bar.
Here’s what our base.html will look like:
When Flask-Bootstrap is initialised by our app, the template “bootstrap/base.html” becomes available to us. This “bootstrap/base.html” template contains the general HTML structure of our page and allows us to derive all of our new templates from this.
(For convenience, I’ve stripped out the navigation bar HTML, I’m using the Bootstrap example code for this).
{% extends "bootstrap/base.html" %}

{% block title %}Hello World app{% endblock %}

{% block head %}
{{ super() }}
    <link rel="shortcut icon" href="{{ url_for('static', filename='favicon.ico') }}" type="image/x-icon">
    <link rel="icon" href="{{ url_for('static', filename = 'favicon.ico') }}" type="image/x-icon">{% endblock %}
{% block navbar %}

<div class="navbar navbar-inverse" role="navigation">
    :
    :
    :
</div>

{% endblock %}

{% block content %}

<div class="container">
    {% block page_content %}{% endblock %}
</div>

{% endblock %}
Blocks like {% title%}, {% navbar %} or {% content %} are called “convenience” blocks, and are built directly into the Flask-Bootstrap, this means we can amend these blocks, without having to directly replace them. In the case of the {% head %} block, we call Flasks super() function, which allows to to amend data to the block, without overwriting the Bootstrap CSS links in the <head></head> tags.
The block we are most interested in is the {% block content %}, inside here we will find the {% block page_content %}, this will allow any template that calls our base.html to replace the contents of this block – through Template Inheritance.
{% block content %}

<div class="container">
    {% block page_content %}{% endblock %}
</div>

{% endblock %}
Here’s what our index.html will look like:
Now that all of our generic HTML has been defined in the base.html, we can create our index.html, as an extension of the base.html template.
{% extends "base.html" %}
{% block title %}Hello World app{% endblock %}

{% block page_content %}

<div>
<h1>{{ message }}</h1>
</div>

{% endblock %}
The index.html defines the contents of the page_content block, in our case we will print the string stored in the Python variable “message”, inside a set of <div> and <h1> tags:
<h1>{{ message }}</h1>
Folder structure:
In this example, we’ll have a base.html file for all of our generic HTML and an index.html, which will be populated by our Python code. This is a basic example, but later I’ll be building several more pages and HTML templates into this project.
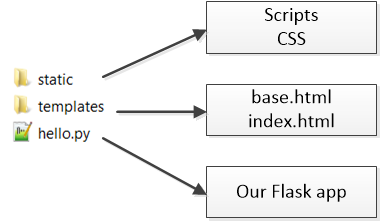
Here is the folder structure Flask uses for defining template and static files.
Running the web server:
Now that the code is complete we can start our web server and see what our index page looks like.
We can start our web server like so:
> python hello.py runserver
* Running on http://127.0.0.1:5000/ (Press CTRL+C to quit)
127.0.0.1 - - [25/Jan/2017 12:45:43] "GET / HTTP/1.1" 200 -
Then navigating to http://127.0.0.1:5000/ we can view our active web server:
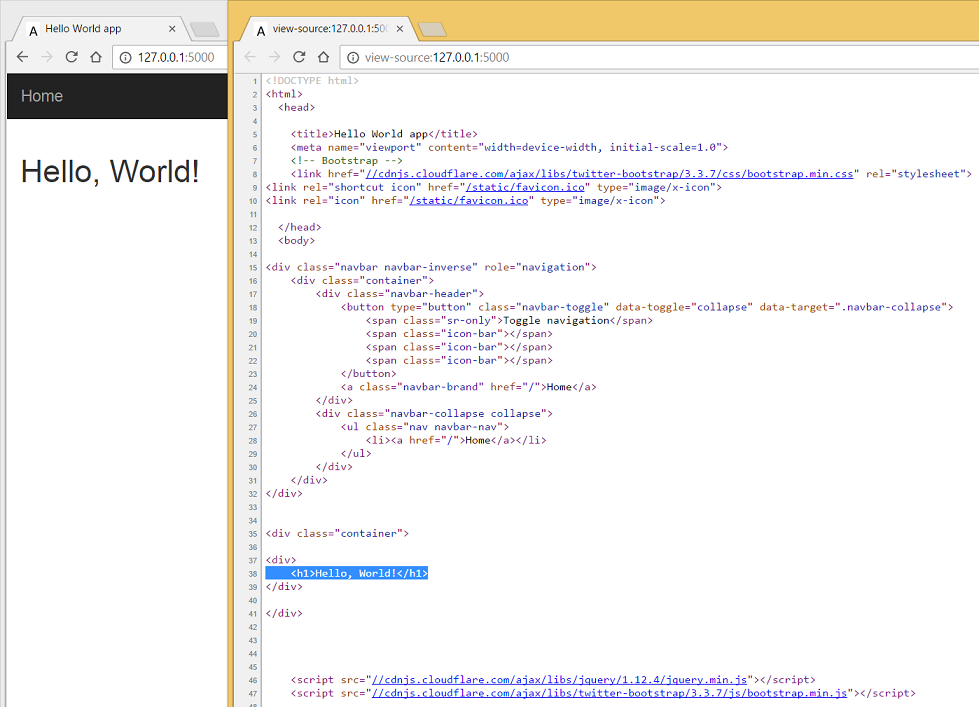
Web server shown on the left and HTML source code on the right.
As we can see, we are no longer outputting just a text string, we are outputting a full HTML web page, created from our base.html, index.html and the output of our Python code.
Download the code:
The full set of Python code can also be found on my GitHub page here: https://github.com/AllynH/Flask_webserver
As there are a few files in this project, it’s best to copy it from there.
Next steps:
Now that we have a web server built in Python using Flask we can:
- Update the code with the new Bungie OAuth login flow.
- Build in our previous Bungie code.
0 Comments
2 Pingbacks